---
title: Quick Start with the CLI
description: Install playground-cli, pair it with the Polkadot App, build your Product, and deploy it to a live dotNS name from the terminal.
categories: Apps
url: https://developer.polkadot.com/apps/quick-start/
word_count: 3248
token_estimate: 5156
version_hash: sha256:74adb1c5271efec99696ba5d8aa786a6215a29fdd1bcb9154b538f4aca3a1c65
last_updated: 2026-11-11T12:33:14+00:00
---
# Quick Start with the CLI
Deploy a Polkadot Product from your terminal with playground-cli. The `pg` command pairs with your [Polkadot App](/reference/apps/hosts/polkadot-app/), builds your Product, uploads the bundle, and publishes it to a dotNS name. No local host setup is required to reach a live deployment.
The CLI is the command-line counterpart to [Polkadot Desktop](/reference/apps/hosts/polkadot-desktop/): Desktop runs published Products by their dotNS names; `pg` takes a project on disk and turns it into one. By the end of this guide, you will have a Product live at its own name, reachable in any browser through the dotNS web gateway.
!!! warning "TestNet names end in `.paseo`, not `.dot`"
dotNS top-level domains are per network. On Paseo Next v2, the TestNet the Apps tooling targets by default, names are minted under `.paseo`: publish `myproject57` and you get `myproject57.paseo`, served at `https://myproject57.paseo.li`. Whether you supply the bare label or the full name depends on the tool; see [Choose a Name](/apps/register-dot-domain/#choose-a-name).
!!! tip "Building with an AI agent?"
Point your coding agent at the right skills, repos, and docs first, so it writes idiomatic Product code instead of generic boilerplate. See [Set Up Your AI Agent](/apps/get-started/set-up-your-ai-agent/) for a paste-ready setup prompt.
!!! note "Products Devnet"
This page uses Paseo Next v2 (`paseo` preset). For the PCF Products Devnet (`devnet` preset), see [Get started as a developer](/apps/get-started/developers/).
## Before You Start
Get these in order before your first deploy. The last two are easy to skip and fail silently later, so do not leave them out:
1. **Install the [Polkadot App](/apps/)** on your phone and create an account. It pairs with `pg` and signs your deploy.
2. **Have a terminal** with `curl` available and permission to install CLI tools in your user shell.
3. **Have a Product project** on disk with a package-manager build command.
4. **Fund your account with PAS** from the [faucet](/apps/get-started/get-testnet-tokens/). PAS pays transaction fees and the name deposit.
5. **Get a Bulletin Chain storage authorization** for the account that will sign. Without it, uploads are rejected at deploy time even when your balance is fine — a prerequisite that surfaces only as a failed publish. See [Get TestNet Tokens](/apps/get-started/get-testnet-tokens/).
!!! warning "Fund the account that actually signs"
The PAS balance and the storage authorization are both per account, and the account that signs your deploy may not be the one you expect. If a deploy fails with `no allowance set for account`, see [Accounts and Signing](/apps/concepts/accounts/) and the [troubleshooting entry](/apps/troubleshooting/#no-allowance-set-for-account). Account mapping to an EVM address is handled for you for the product account you deploy with; a smart contract needs its signing account mapped explicitly, covered in [Add a Smart Contract to Your Product](/apps/build/deploy-a-smart-contract/).
!!! note "What a first deploy costs"
In one test run, taking an app live cost about 10.4 PAS: roughly 10 PAS for the name and about 0.4 PAS for a 2.6 KB upload, with each on-chain step taking around a minute. Name cost depends on length and tier, so treat these as a ballpark. On TestNet, funding is rarely the constraint.
!!! note "CLI version"
The CLI is in active development, and breaking changes between versions are expected. If a command below no longer matches, check this page's last update against the latest [playground-cli release](https://github.com/paritytech/playground-cli/releases).
## Install the CLI
The installer supports Linux and macOS. On Windows, work inside [WSL](https://learn.microsoft.com/windows/wsl/install) and follow the Debian/Ubuntu steps there.
1. Install the base prerequisites. macOS needs no preparation: `curl` ships with the OS, and the Xcode Command Line Tools cover the rest. On a fresh Debian or Ubuntu system:
```bash
sudo apt update && sudo apt install -y build-essential curl
```
2. Run the installer:
```bash
curl -fsSL https://raw.githubusercontent.com/paritytech/playground-cli/main/install.sh | bash
```
The binary lands in `~/.polkadot/bin/`, with both commands symlinked into `~/.local/bin/` and that path appended to your shell RC file.
3. Open a new shell, or `source` your RC file, and verify the install:
```bash
pg --version
```
!!! note "Command aliases"
The installer registers two interchangeable commands: `playground` (canonical) and `pg` (short alias). This guide uses `pg` throughout.
!!! tip "Pinning a version"
Pass `VERSION` to install a specific release, for example `curl -fsSL … | VERSION=v0.47.0 bash`. Later, `pg update` moves you to the newest release.
## Log In
`pg login` is the first-run setup: it pairs the CLI with your signer, installs the toolchain, and requests your service allowances. It is safe to re-run; existing installs and sessions are detected and skipped. Do not reach for `pg init` here — that scaffolds a project from the starter template and pairs nothing.
```bash
pg login
```
pg login
✔ logged in 5GrwvaEF5zXb26Fz9rcQpDWS57CtERHpNehXCPcNoHGKutQY
✔ account in use playground.dot/0 — 0x90b5ab205c6974c9ea841be688864633dc9ca8a3 · 5FHneW46xGXgs5mUiveU4sbTyGBzmstUspZC92UhjJM694ty
Three things happen, and the first two run concurrently:
1. **Login**: A QR code is printed to the terminal. Scan it with the Polkadot App to pair. Skipped if you already have a session under `~/.polkadot-apps/`.
2. **Toolchain install**: `git`, `curl`, a C linker, `rustup` with nightly and `rust-src`, `cargo-pvm-contract`, `wget`, and the `ipfs` CLI (Kubo). Existing installs are detected and skipped.
3. **Account setup**: Once a session exists, your phone shows a single approval dialog requesting the `BulletInAllowance` (Bulletin uploads at deploy time) and `SmartContractAllowance` (which mints PGAS to your `playground.dot/0` product account and account-maps it on chain).
!!! warning "`pg deploy` needs the `ipfs` CLI, and `pg login` is what installs it"
Do not skip this step. `pg deploy` requires the Kubo `ipfs` binary on your `PATH`; if you never log in, install it yourself with `brew install ipfs` or from [docs.ipfs.tech/install](https://docs.ipfs.tech/install/). This is a temporary requirement while the pure-JS merkleizer is being fixed.
!!! note "Signer modes"
Signer choice is made at deploy time, not at login, through `pg deploy --signer`:
- **Mobile signer** (`--signer phone`): Signs with the account you paired here, approving each on-chain step on your phone. Recommended for any deploy you intend to keep.
- **Dev-only signer** (`--signer dev`): No phone needed; uses shared development keys (pair it with `--suri //Alice` to pin a known keypair). The deployed Product will be owned by the shared dev account, not by you.
!!! note "Funding is opt-in"
`pg login` never sends tokens. If your product account needs a testnet balance, run `pg drip` to top it up (1 PAS per run, up to 10 PAS, from a shared dev funder), or use the [faucet](/apps/get-started/get-testnet-tokens/). Run `pg status` at any time to see your product account address, its balances, and your allowance state.
## Build
`pg build` auto-detects and runs your project build.
```bash
pg build
```
pg build
✔ Build succeeded → dist/
## Deploy
`pg deploy` runs the full pipeline: build the frontend, upload artifacts to the Polkadot Bulletin Chain, and register a dotNS domain under the environment's TLD (`.paseo` on Paseo Next v2). Before building, it always runs your package manager's install step to keep dependencies in sync.
```bash
# Interactive - pg prompts for signer, domain, and build directory
pg deploy
# Dev signer - no phone needed (the deployed Product is owned by the shared dev account)
pg deploy --signer dev --suri //Alice --domain my-product
```
Pass the bare label to `--domain`. The CLI appends the environment's TLD, so `my-product` becomes `my-product.paseo` on Paseo Next v2. Name availability depends on the label's length, counted as written; see [Choose a Name](/apps/register-dot-domain/#choose-a-name) for the rules the prompt enforces.
pg deploy --signer dev --suri //Alice --domain my-product
✔ my-product.paseo is available
✔ Deploy complete
URL https://my-product.paseo.li
Domain my-product.paseo
App CID bafybeihvru3e6ojhopxj7xxwtafrpyvsha6kylzklryon5k67u4clr26re
!!! note "Your phone will prompt — check it"
With the phone signer, each on-chain step waits for you to approve it in the Polkadot App, and no push notification announces the prompt. If the deploy seems to pause (including a deliberate ~60-second wait while your name is registered), open the app and approve the pending request. See [Troubleshooting](/apps/troubleshooting/#the-app-seems-frozen-after-an-action).
!!! note
`pg deploy` includes a memory watchdog that aborts the deploy if the process exceeds 4 GB RSS. If you hit this limit, set `DOT_MEMORY_TRACE=1` alongside `DOT_DEPLOY_VERBOSE=1` to capture per-second RSS and heap samples.
For the full interactive deploy walkthrough, including the domain-name rules, contract redeploys, and the confirmation summary, see [Deploy Your App](/apps/deploy-your-app/).
??? note "More CLI commands"
**Account and session**
- **`pg status`**: Prints your signed-in product account in both encodings (SS58 and H160), its PAS and PGAS balances, and the state of your Bulletin and smart-contract allowances. Read-only: it signs nothing and submits nothing, so it is safe to run at any time. With no session paired it prints a "log in first" notice and exits cleanly.
```bash
pg status
```
- **`pg drip`**: Tops up your product account with a little TestNet PAS: 1 PAS per run, up to a 10 PAS cap, from a shared dev funder rather than the public faucet. It only ever funds the caller's own account, resolved from the active session, so there is no address flag. Login never calls it for you.
```bash
pg drip
```
- **`pg logout`**: Signs out of the paired account, tells the paired phone to drop its side of the connection, and clears session files under `~/.polkadot-apps/`. A no-op if you are not signed in.
```bash
pg logout
```
**Projects and deploys**
- **`pg init`**: Scaffolds a new project from the playground starter template. A shorthand for `pg mod playground-template`.
```bash
pg init
```
- **`pg mod`**: Clones a moddable app from the Playground registry so you can customize and redeploy it as your own Product. Only apps that opted into `--moddable` at deploy time are listed. Pass a domain label, such as `my-product` or `my-product.paseo`, to clone directly, or omit it to open an interactive picker showing every moddable app. Source is fetched as a tarball over HTTPS, so neither `git` nor `gh` is required.
```bash
pg mod [domain]
```
- **`pg decentralize`**: Takes a static site you already have — a live URL to mirror, or a local build directory — uploads it to the Bulletin Chain, and registers a dotNS name pointing at it. The counterpart to `pg deploy`, which builds your project first.
```bash
pg decentralize --site https://example.com
pg decentralize --path ./dist
```
- **`pg deploy-all`**: Deploys several apps listed in a JSON manifest in one invocation. Builds run in parallel, while all on-chain work is serialized per signing account so concurrent deploys never collide on a nonce. Non-interactive by design.
```bash
pg deploy-all --manifest apps.json --signer dev --playground
```
- **`pg contract`**: The playground-native path to contracts, backed by `cdm`. `pg contract deploy` builds, deploys, and registers your contracts signed by your logged-in account; `pg contract install` writes `cdm.json` and the generated type outputs. See [Add a Smart Contract to Your Product](/apps/build/deploy-a-smart-contract/) for the workflow, including when to call `cdm` directly instead.
```bash
pg contract deploy
pg contract install [libraries...]
```
- **`pg update`**: Updates `pg` to the latest version from the GitHub releases page.
```bash
pg update
```
!!! tip "Scripting a deploy, or handing one to an agent"
`pg deploy -y` runs non-interactively using defaults, skipping every prompt. It requires `--domain`, and `--signer` defaults to `dev`. For full control in CI, pass `--signer`, `--domain`, `--buildDir`, and `--playground` explicitly; add `--suri //Alice` with `--signer dev` so the dev signer uses a known keypair. See [Set Up Your AI Agent](/apps/get-started/set-up-your-ai-agent/) for orienting a coding agent around this toolchain.
You have deployed a Polkadot Product. To keep building it with your own editor and toolchain, head to the Build guides; they open with [project setup](/apps/build/#set-up-your-project) so Polkadot Desktop can load your Product from `localhost` while you iterate with live reload.
## Where to Go Next
- Learn **Product SDK**
---
Understand the SDK that powers your Product: what each package does and how the pieces fit together.
[:octicons-arrow-right-24: Product SDK](/apps/product-sdk/)
- Guide **Build Guides**
---
Set up the local dev loop, then add capabilities to your Product: signing, on-chain reads, decentralized storage, off-chain pub/sub, local persistence, and smart contracts.
[:octicons-arrow-right-24: Open Build Guides](/apps/build/)
- Guide **Deploy Your App**
---
The full deploy flow in depth: build the bundle, register a dotNS name, publish to the playground, and go live on the Bulletin Chain.
[:octicons-arrow-right-24: Deploy Your App](/apps/deploy-your-app/)
# Quick Start with RevX
Generate and publish a Polkadot Product in the browser with RevX App Builder. RevX gives you a browser-based IDE, scaffolds a Product from a natural-language prompt, and publishes it to a `.dot` name after you sign the final step with the Polkadot App.
This route does not require a local development environment. By the end, you will have configured an AI provider in App Builder, generated a Polkadot Product from a prompt, inspected the generated code, and published it to `.dot`.
!!! warning "TestNet names end in `.paseo`, not `.dot`"
dotNS top-level domains are per network. On Paseo Next v2, the TestNet the Apps tooling targets by default, names are minted under `.paseo`: publish `myproject57` and you get `myproject57.paseo`, served at `https://myproject57.paseo.li`. Whether you supply the bare label or the full name depends on the tool; see [Choose a Name](/apps/register-dot-domain/#choose-a-name).
!!! note "Products Devnet"
This page uses Paseo Next v2 (`paseo` preset). For the PCF Products Devnet (`devnet` preset), see [Get started as a developer](/apps/get-started/developers/).
## Prerequisites
Before starting, make sure you have:
- The [Polkadot App](/apps/) installed on your phone with an account created; it signs the final publish step.
- An API key for an AI provider supported by App Builder, such as OpenAI or Anthropic.
## Open RevX
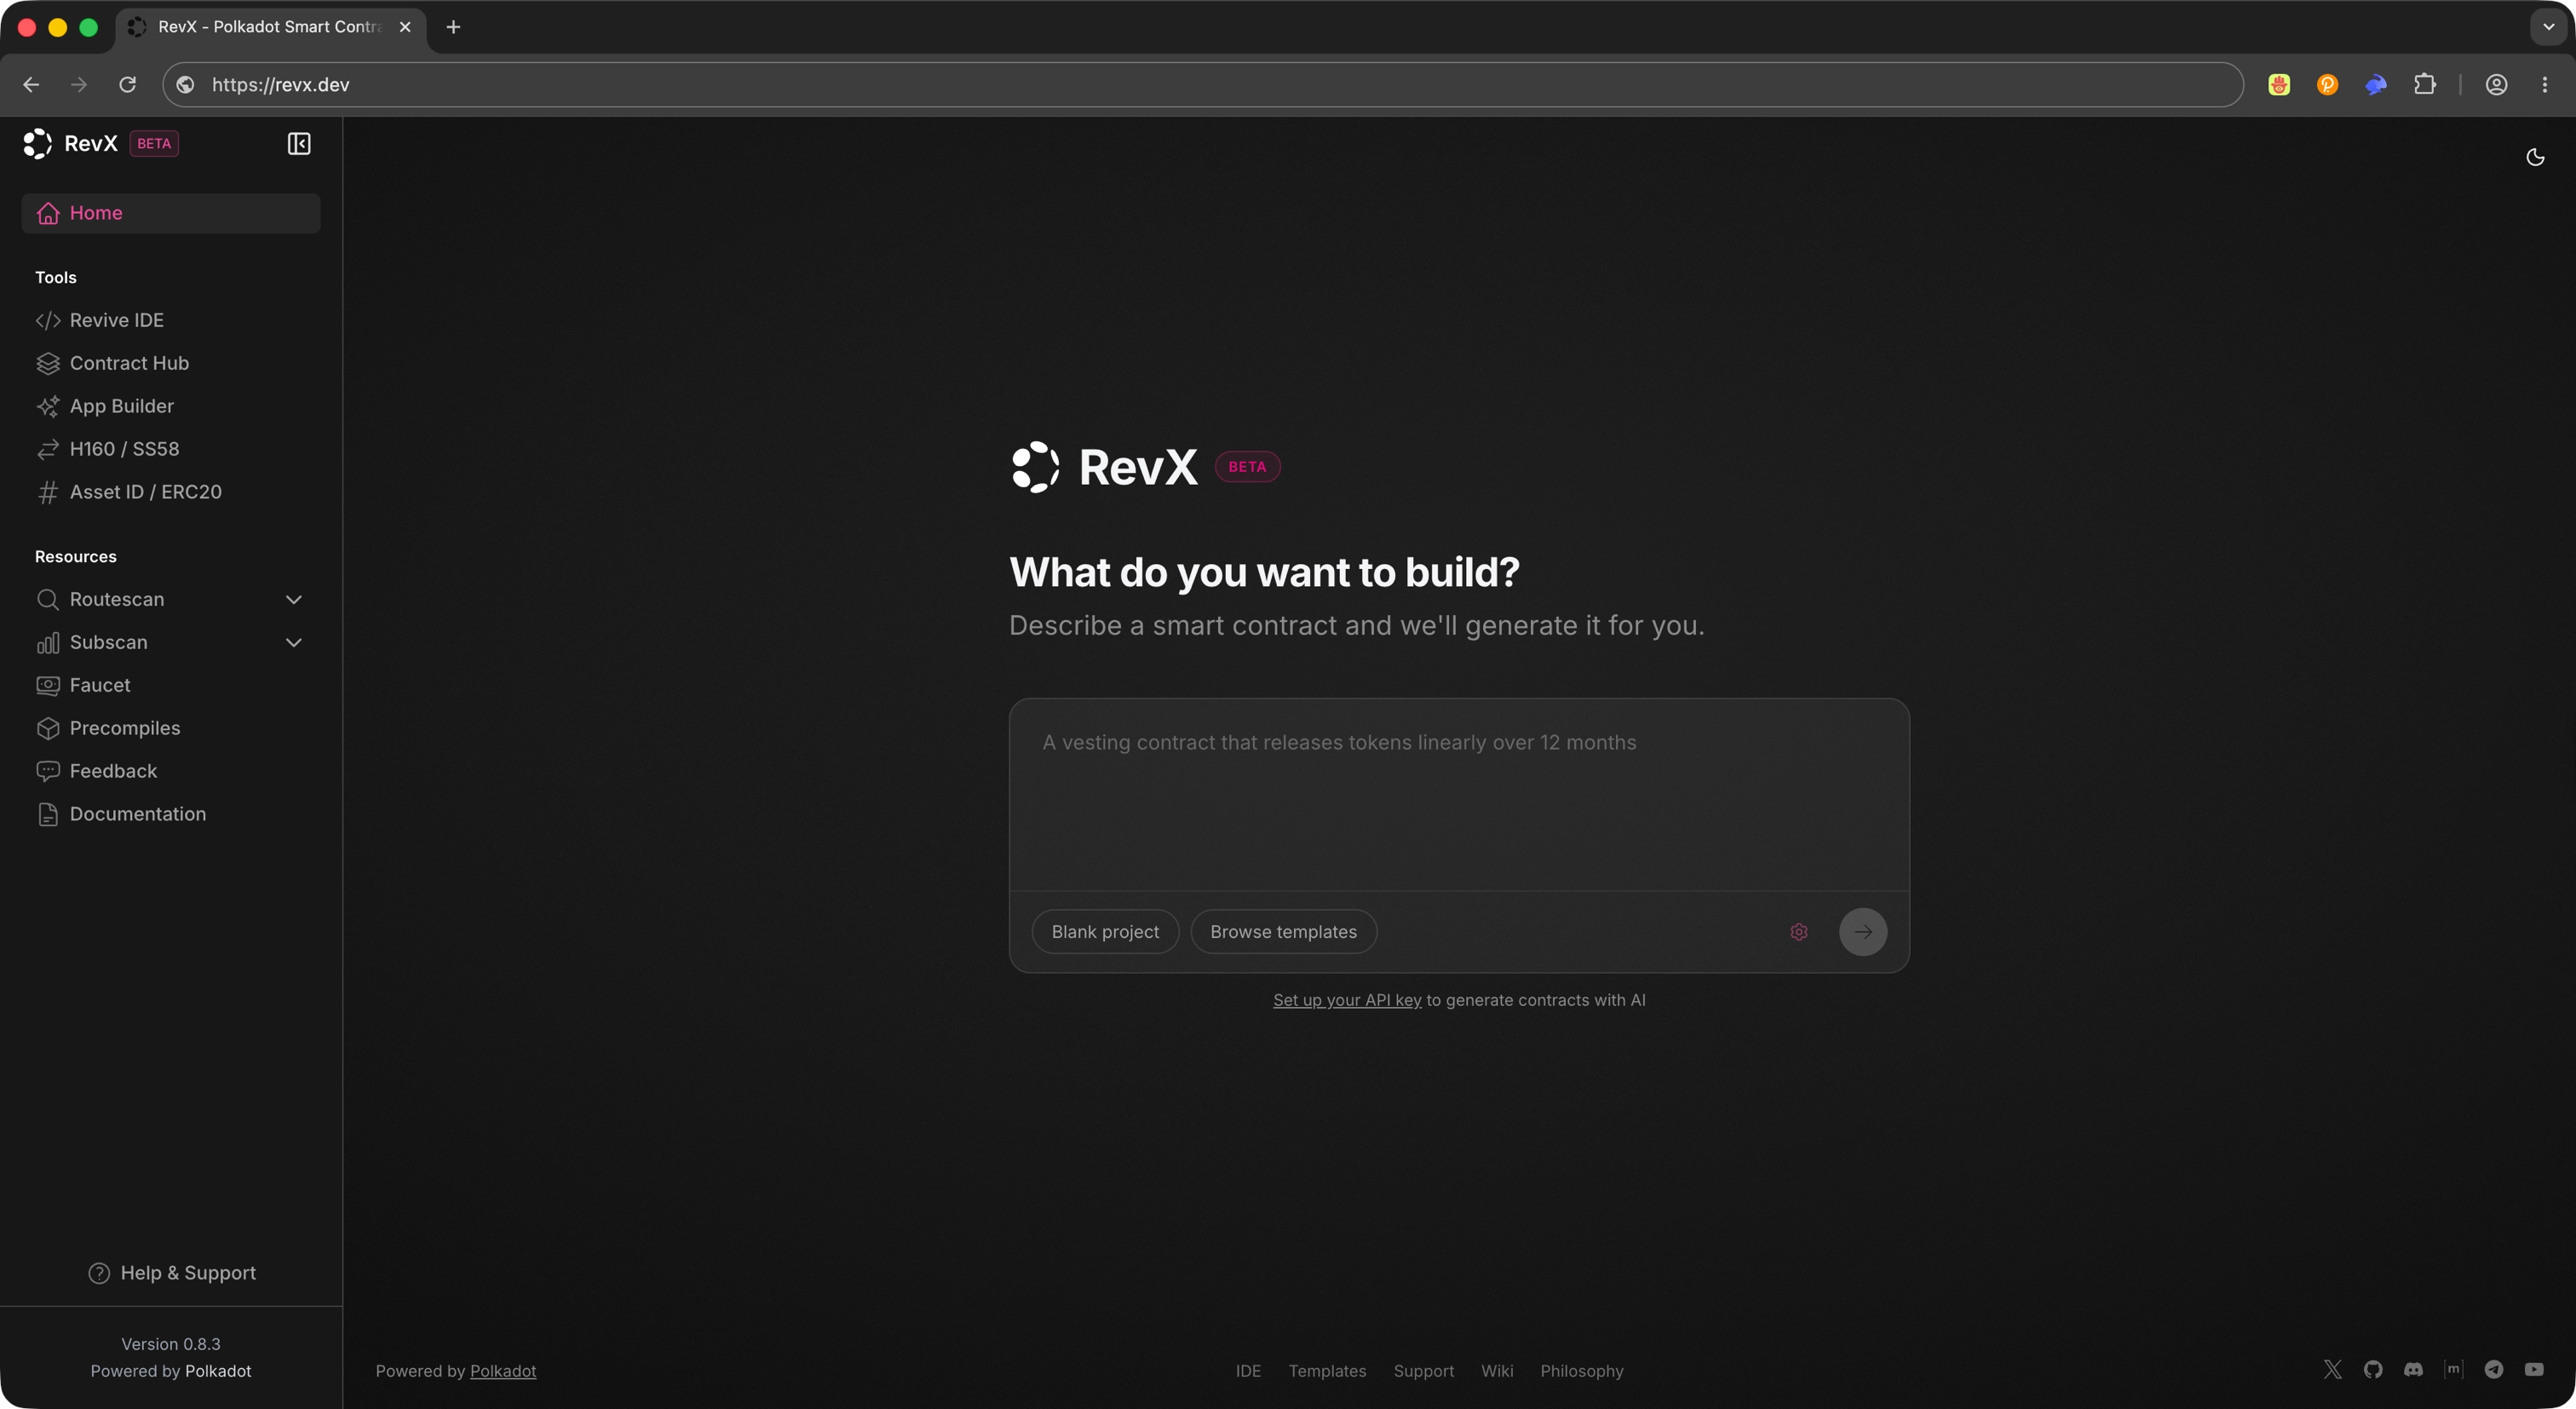
Open [RevX](https://revx.dev/) in your browser. RevX is a browser-based IDE; you will use the App Builder track to scaffold a Polkadot Product end to end.
## Open App Builder
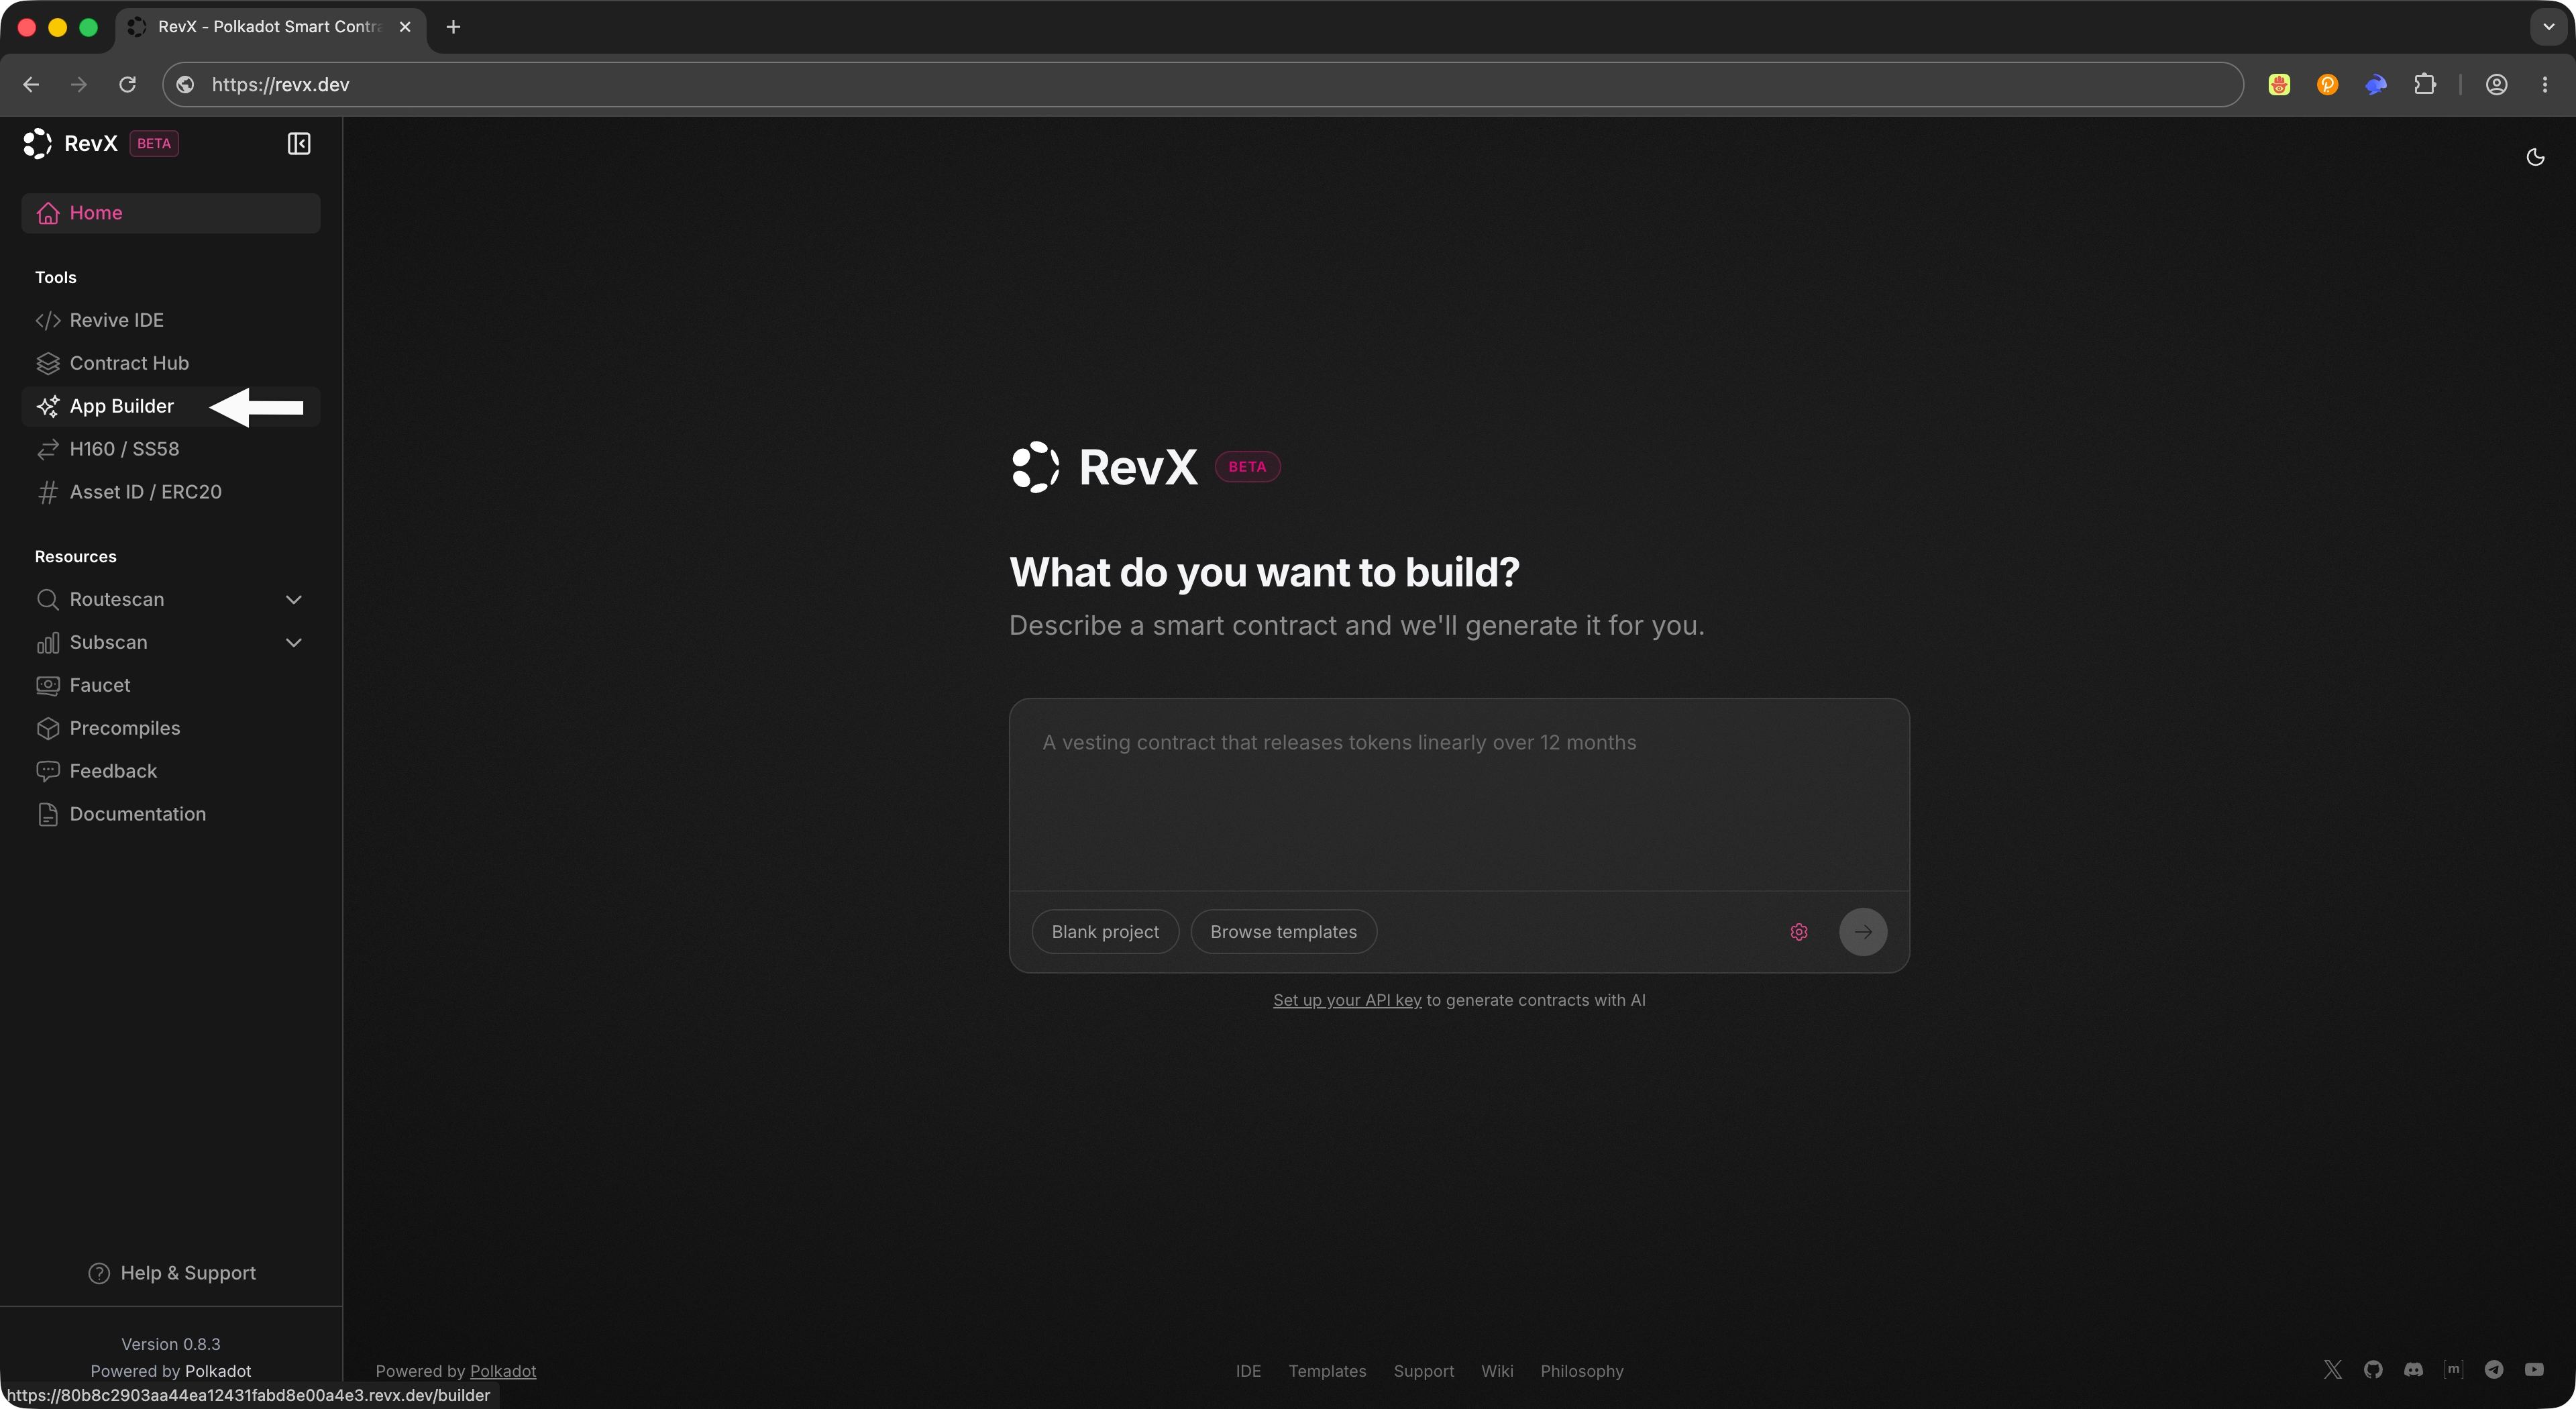
From the sidebar, select **App Builder**. App Builder is RevX's track for generating Polkadot Products using AI-assisted workflows.
## Create a New App
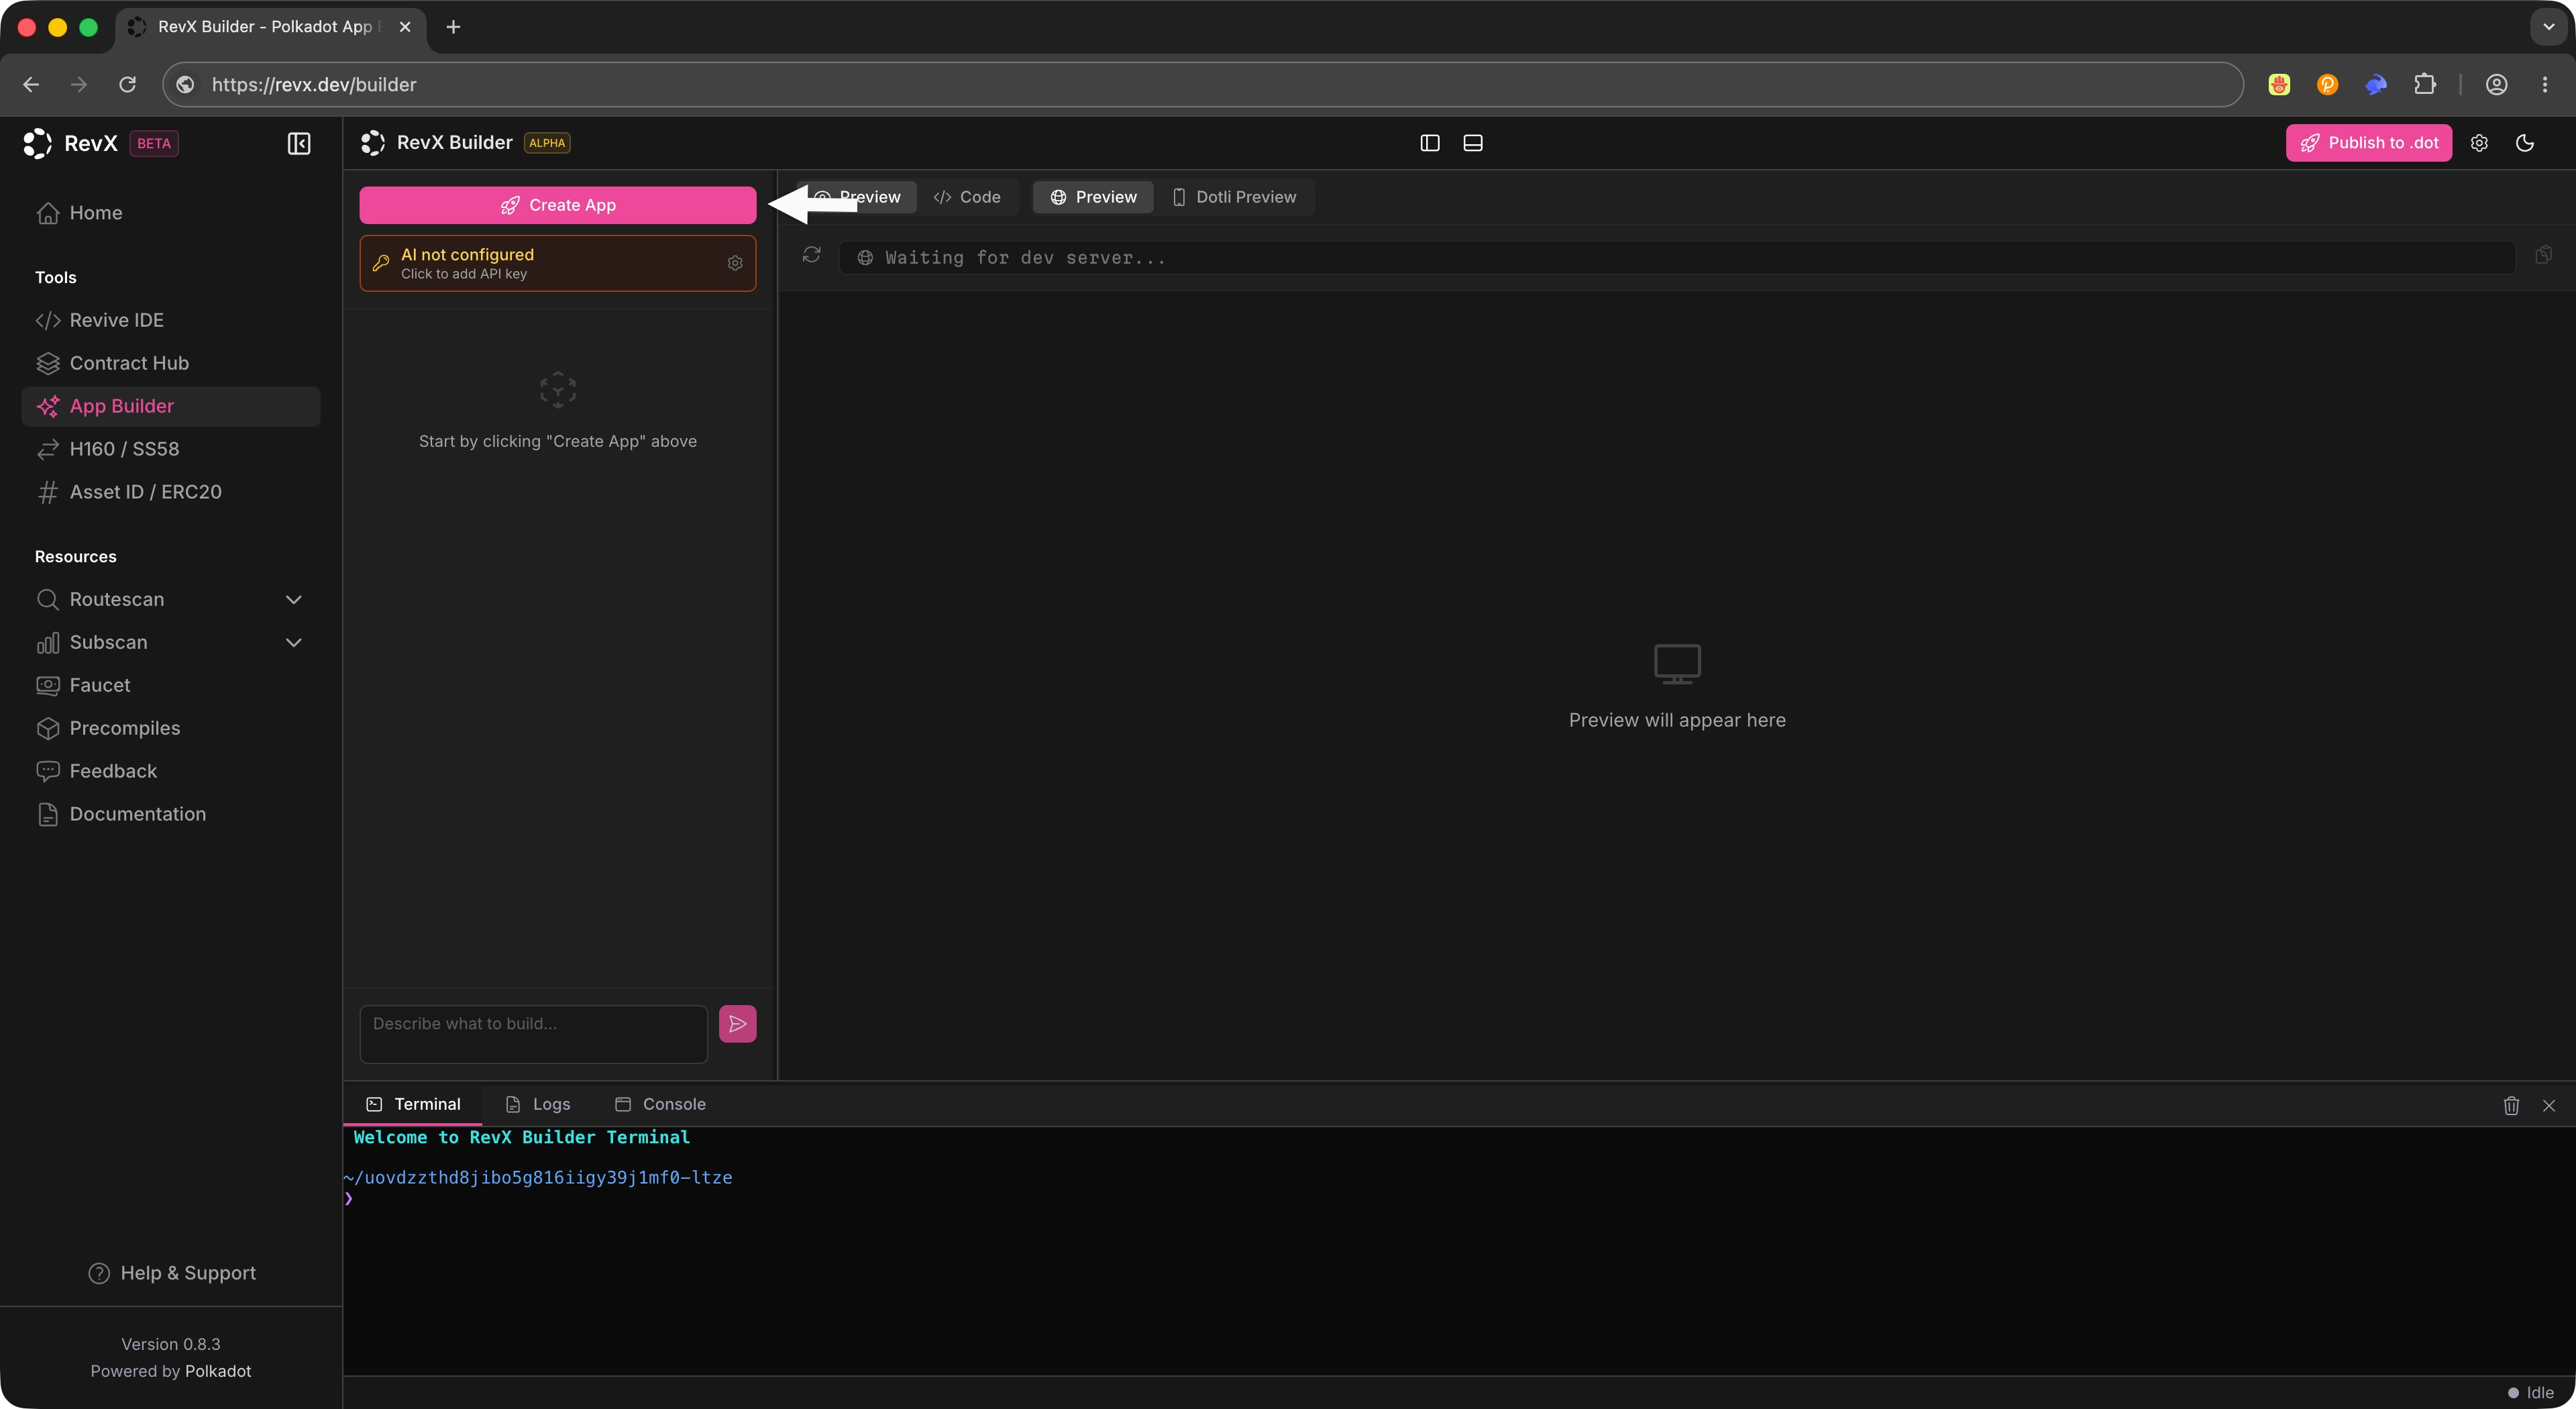
Click **Create App** to start a new project. RevX automatically installs the required dependencies and initializes the project environment so you can move straight into configuration and prompting.
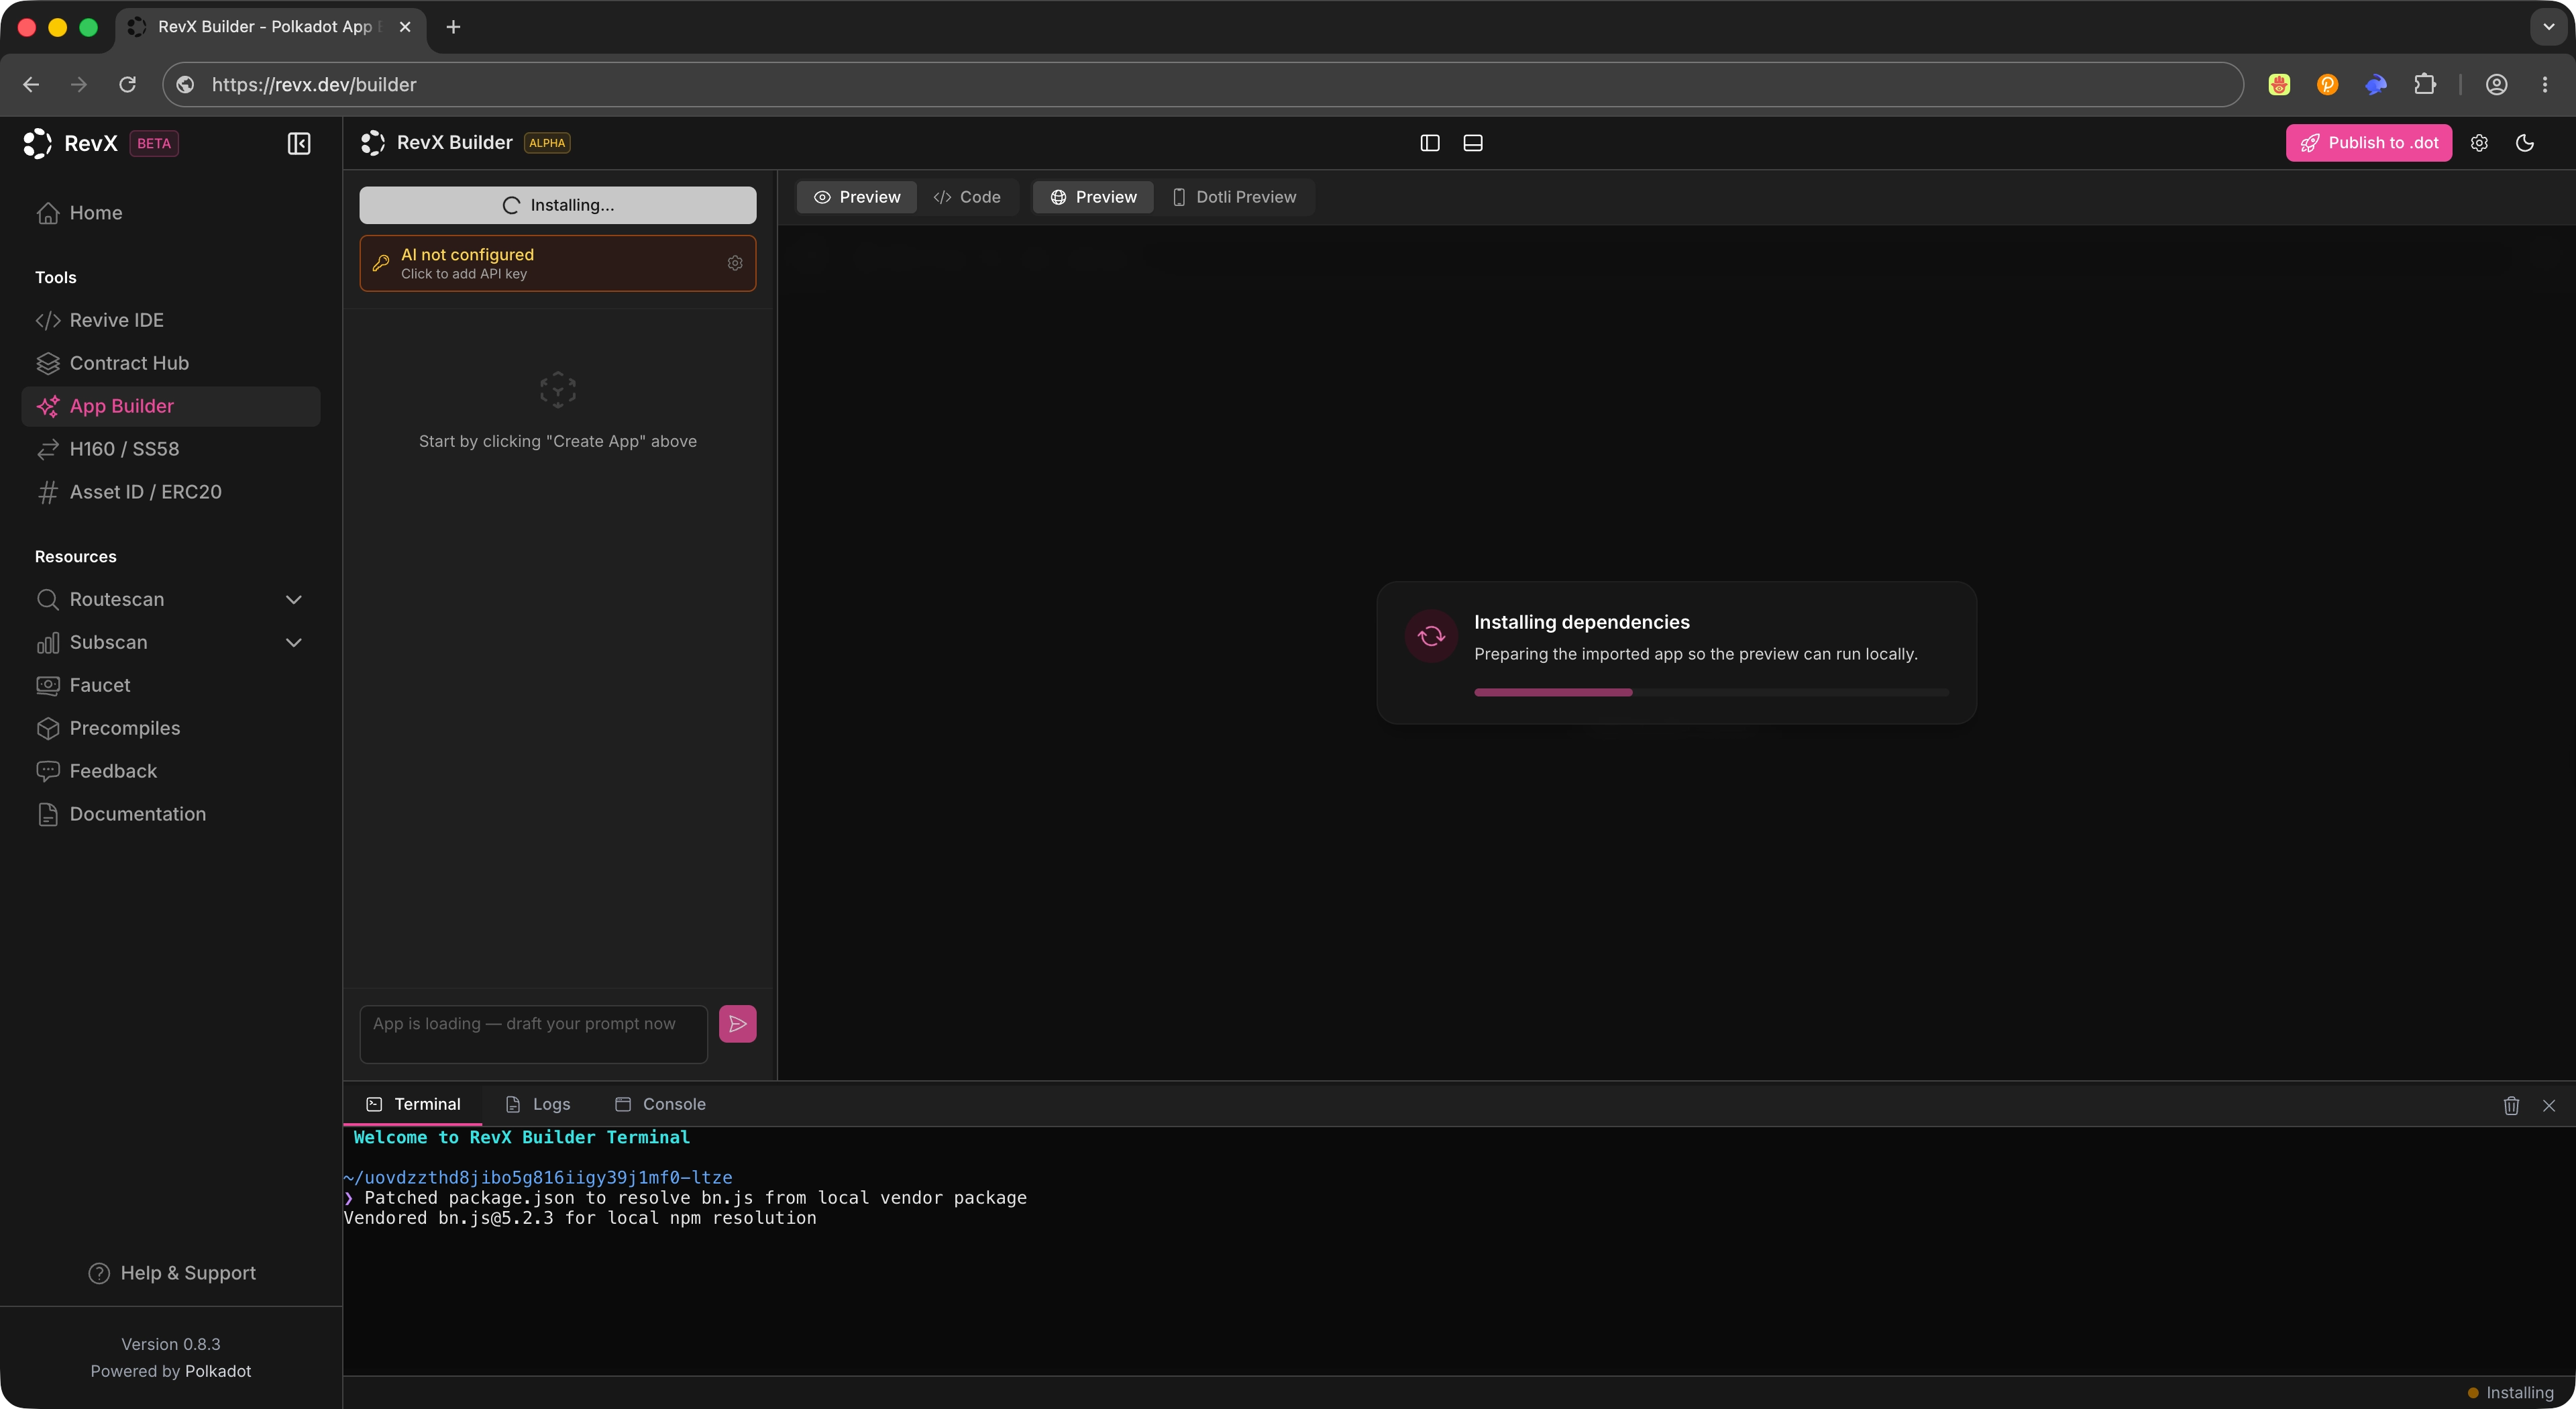
After clicking **Create App**, you will see a loading screen while the IDE initializes the project environment.
!!! note
Initial setup may take a moment while dependencies install. Wait for the environment to finish initializing before configuring the builder.
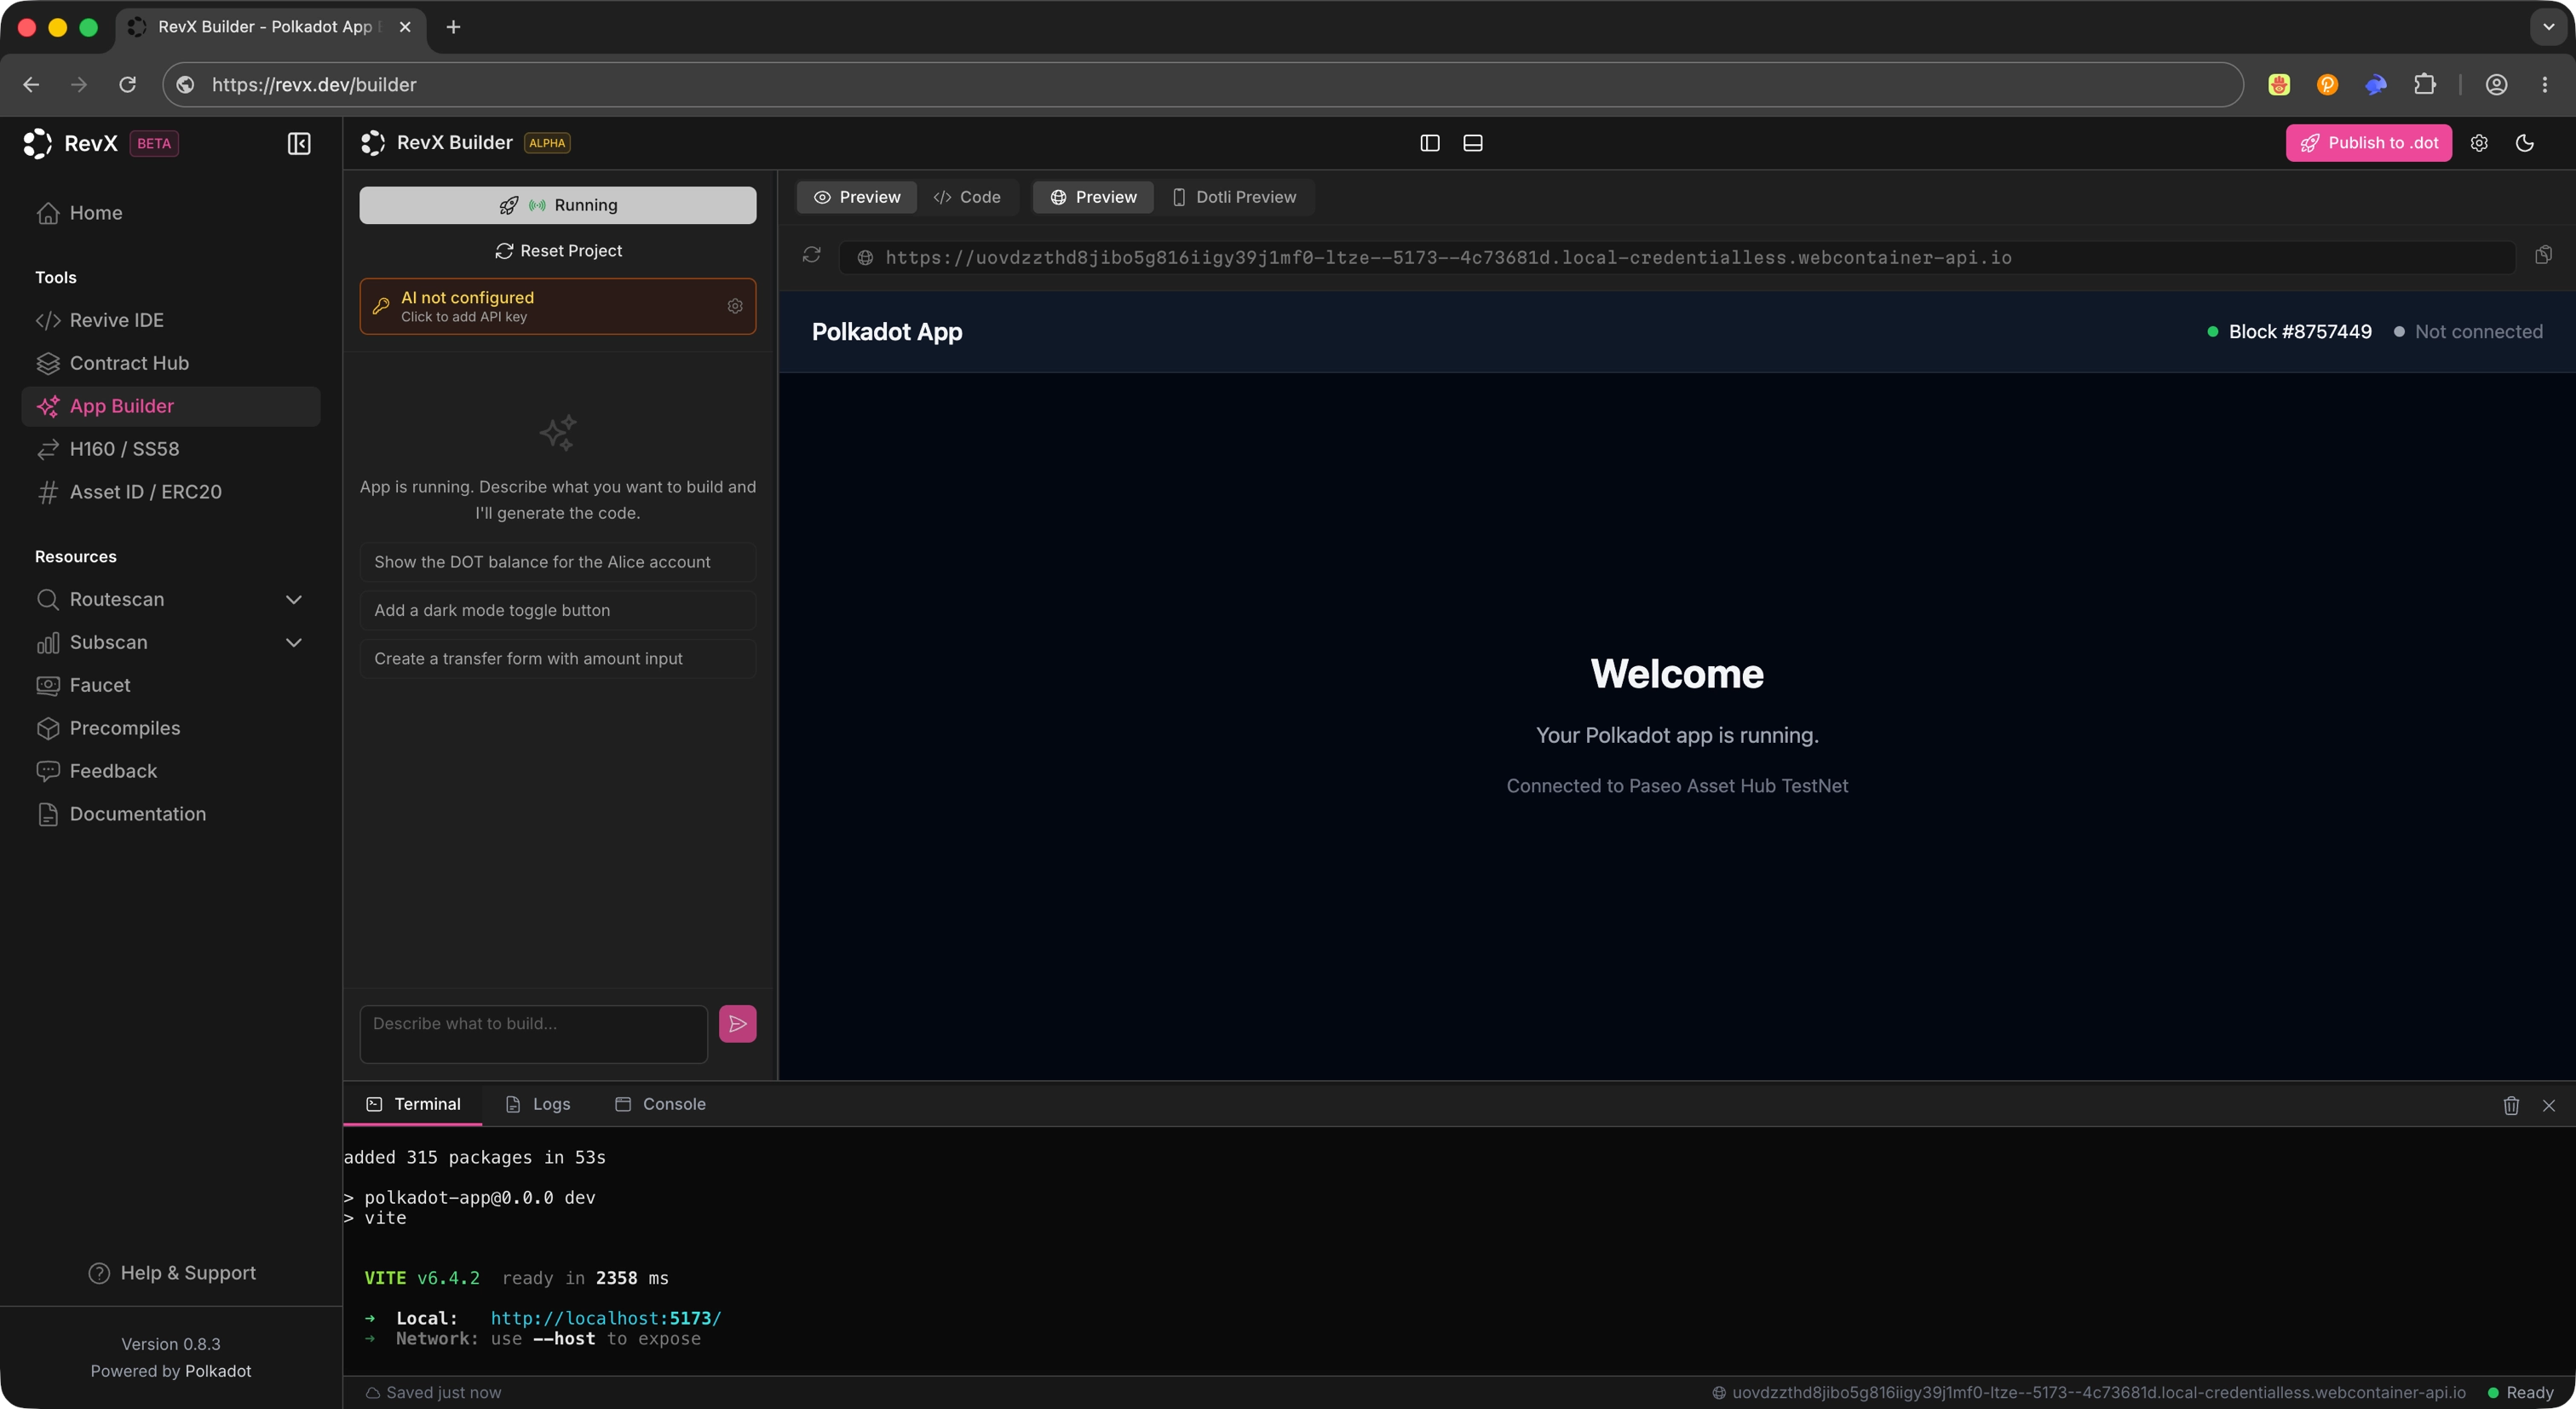
Once the environment is initialized, you will see a minimal app scaffolded in the editor and running in the terminal.
## Configure the Builder
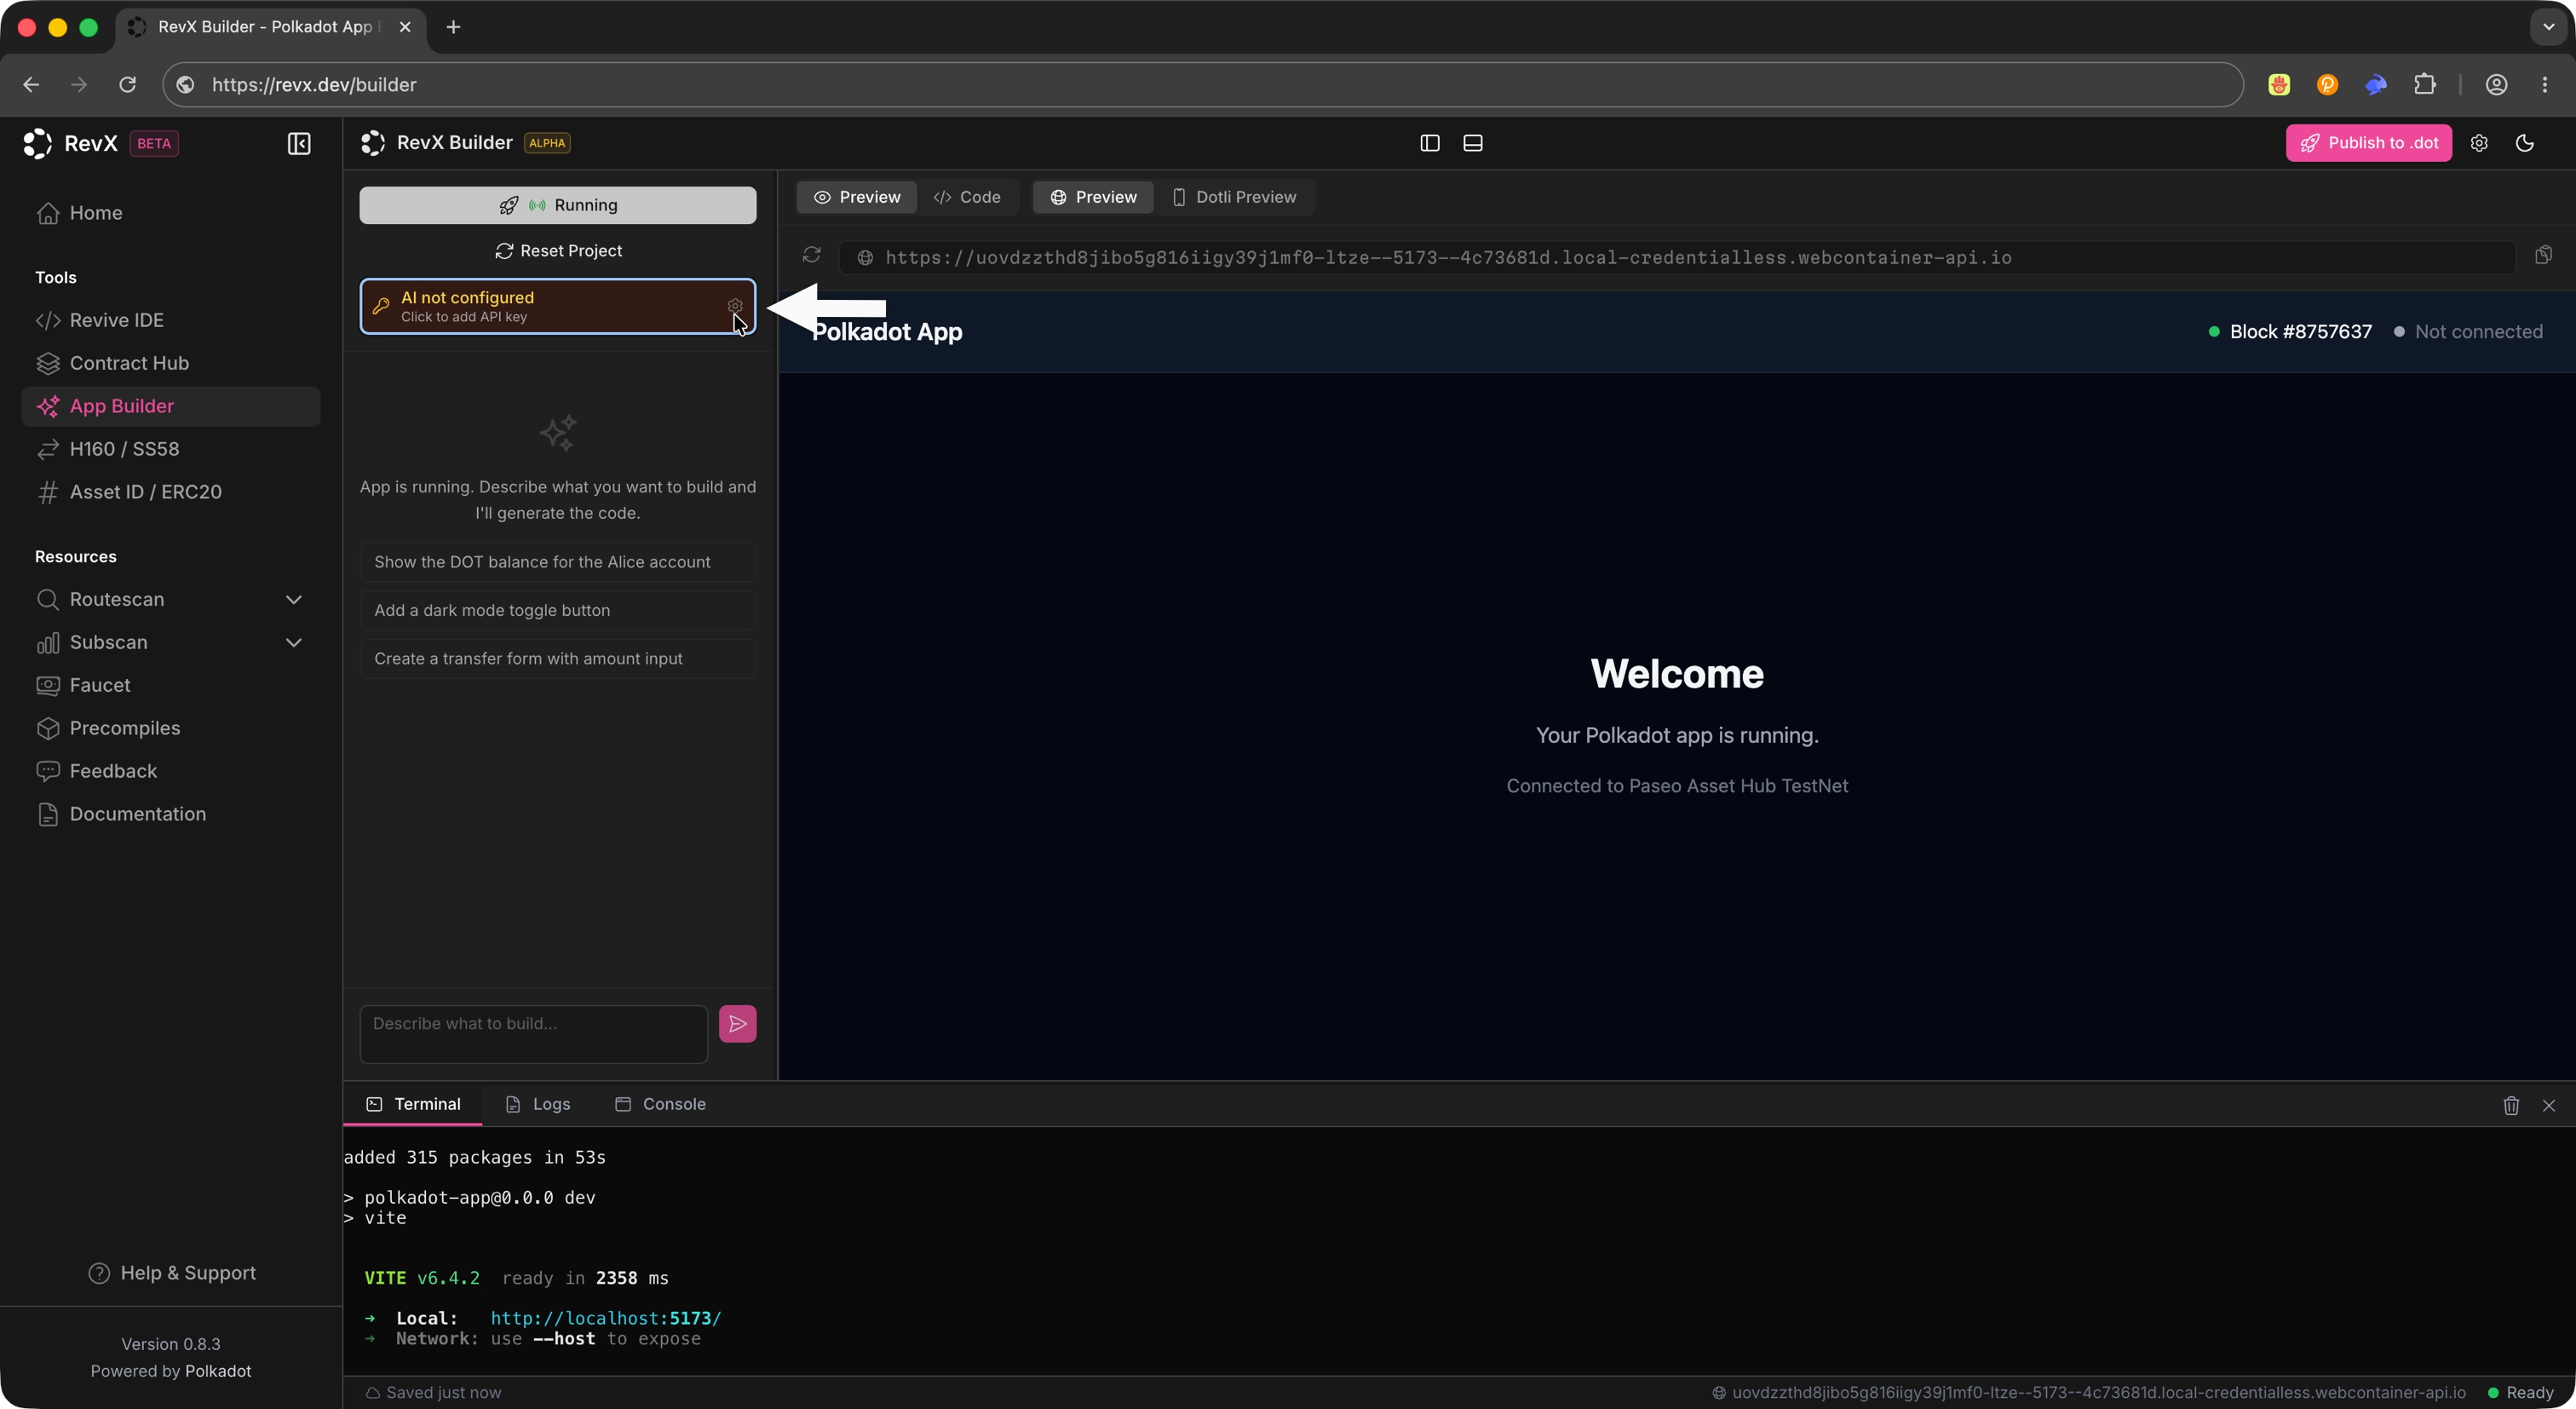
From the App Builder view, click the **Settings** icon to open the AI configuration panel.
Configure the following:
- **AI provider**: The backend service that powers code generation.
- **API key**: The credential for your AI provider.
- **Model**: The specific model to use from the selected provider.
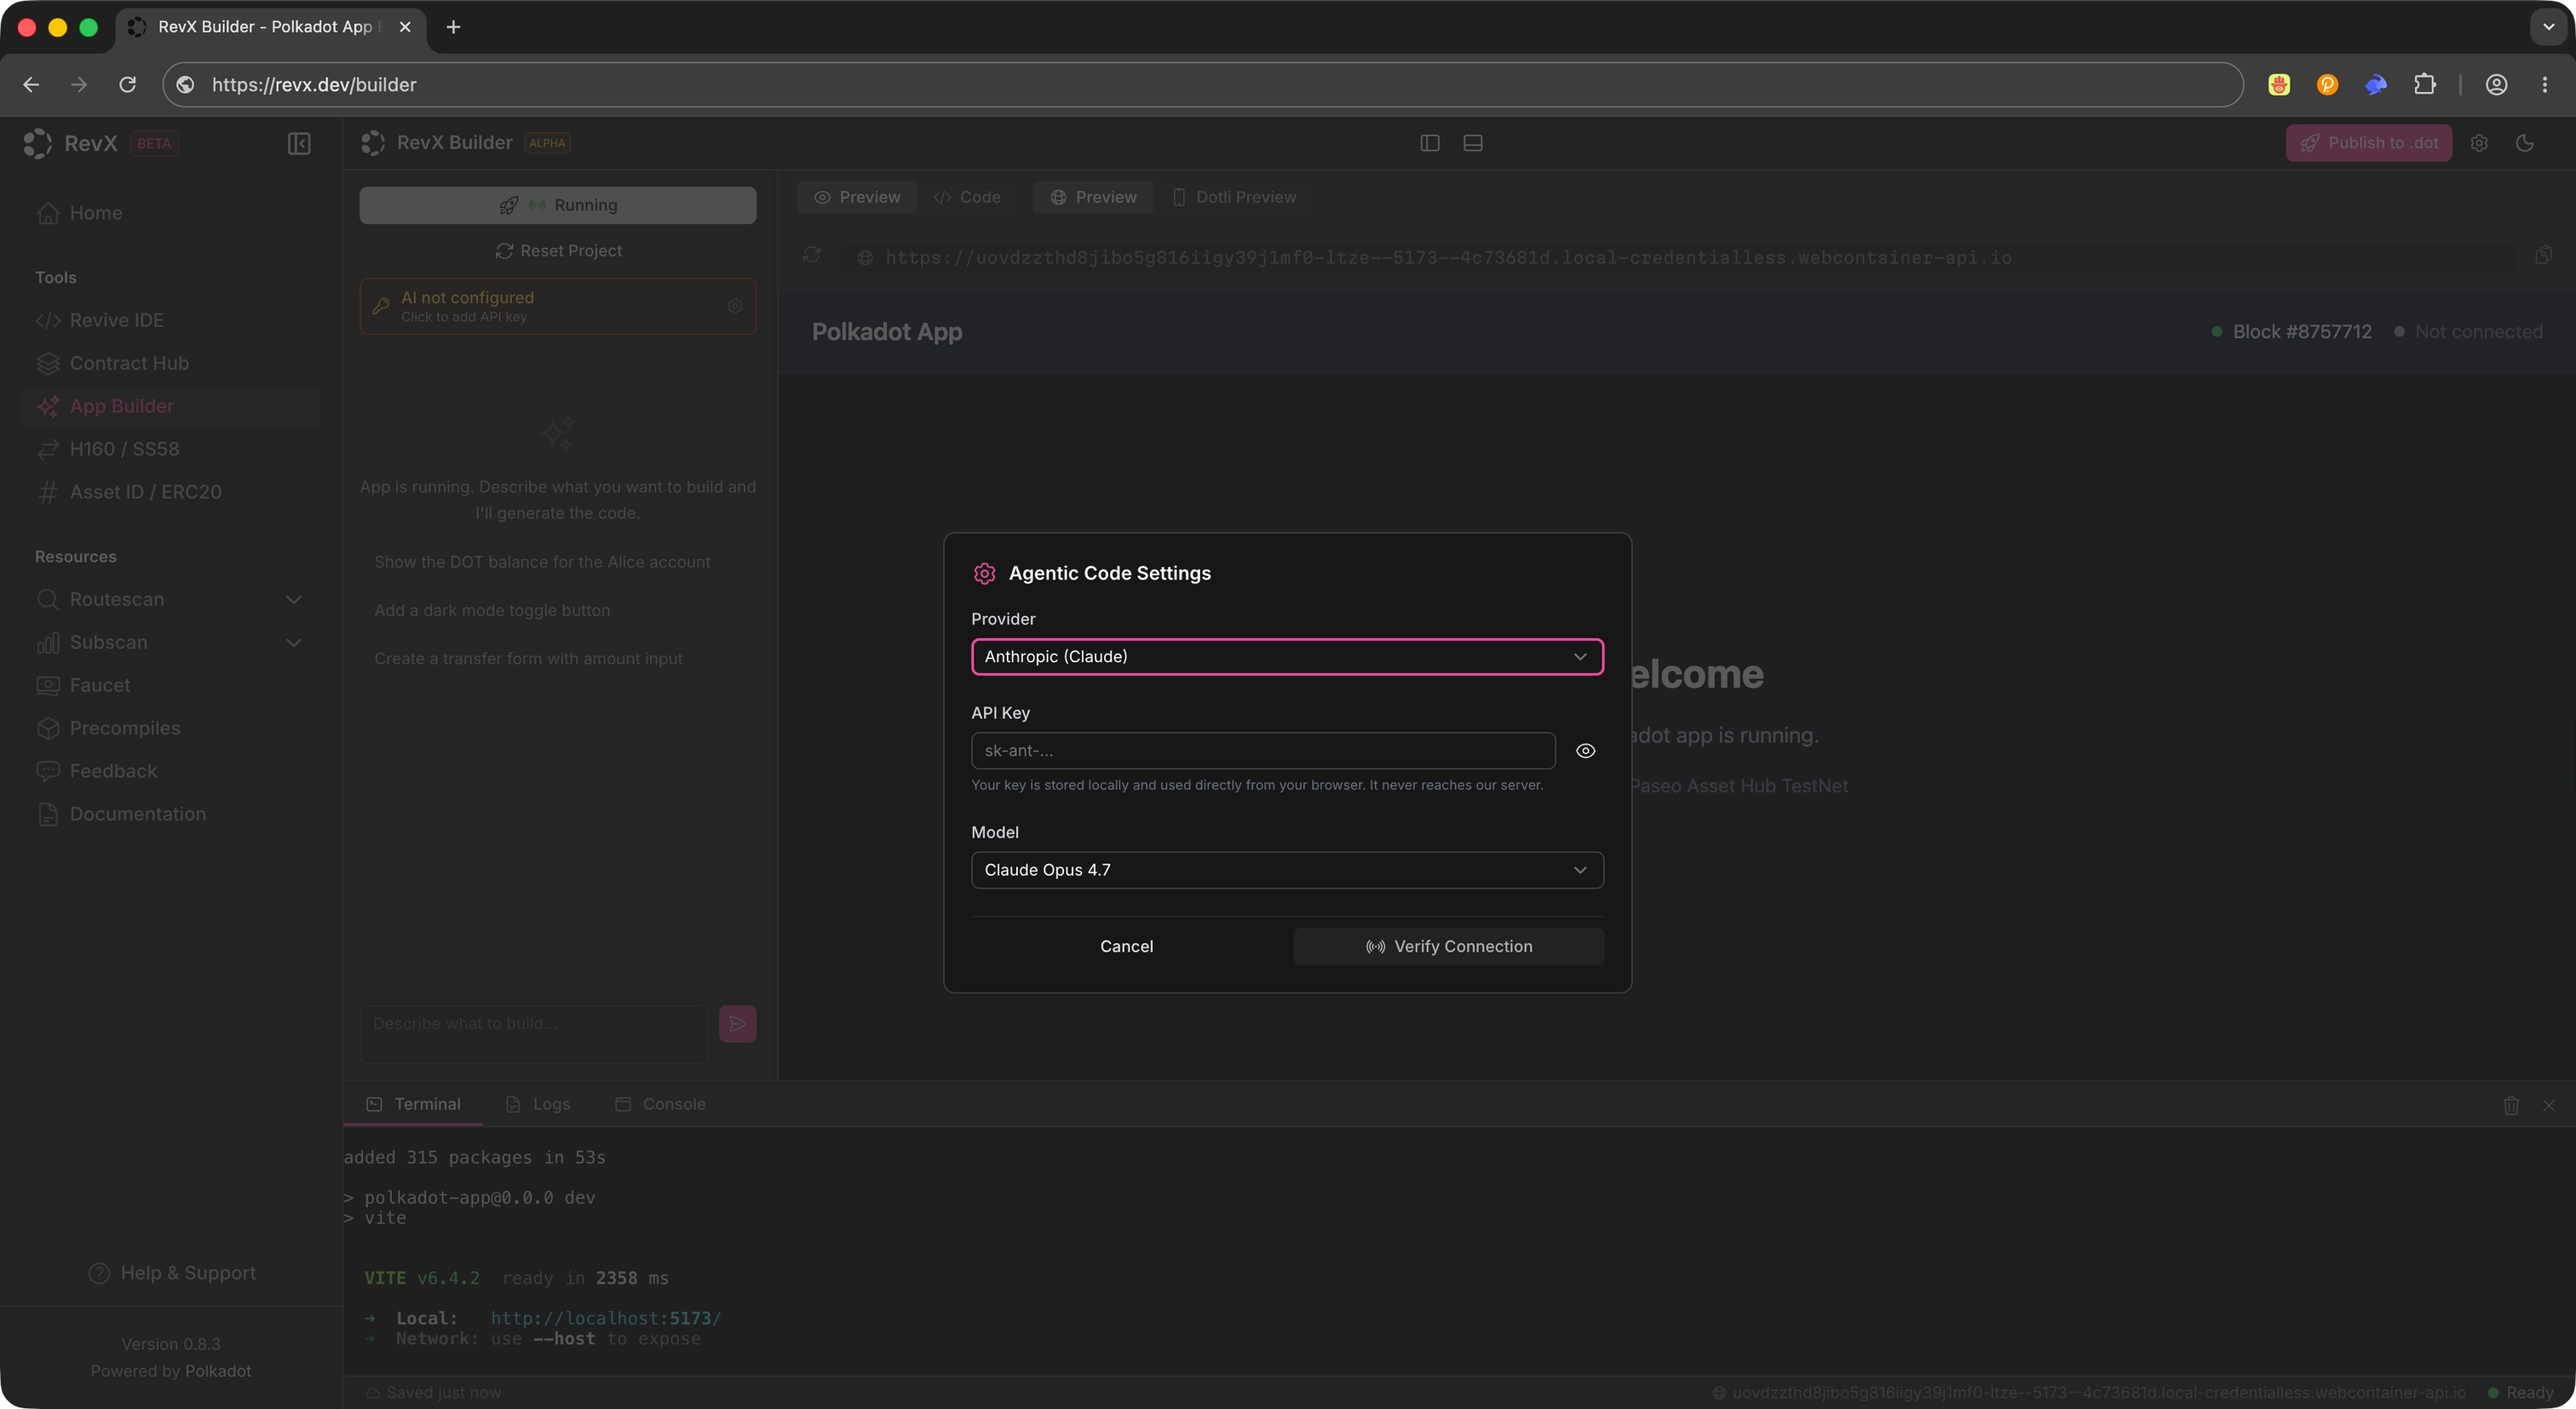
These settings let the IDE generate applications using the selected AI backend. You can change them at any time if you want to switch providers or models.
## Generate an App
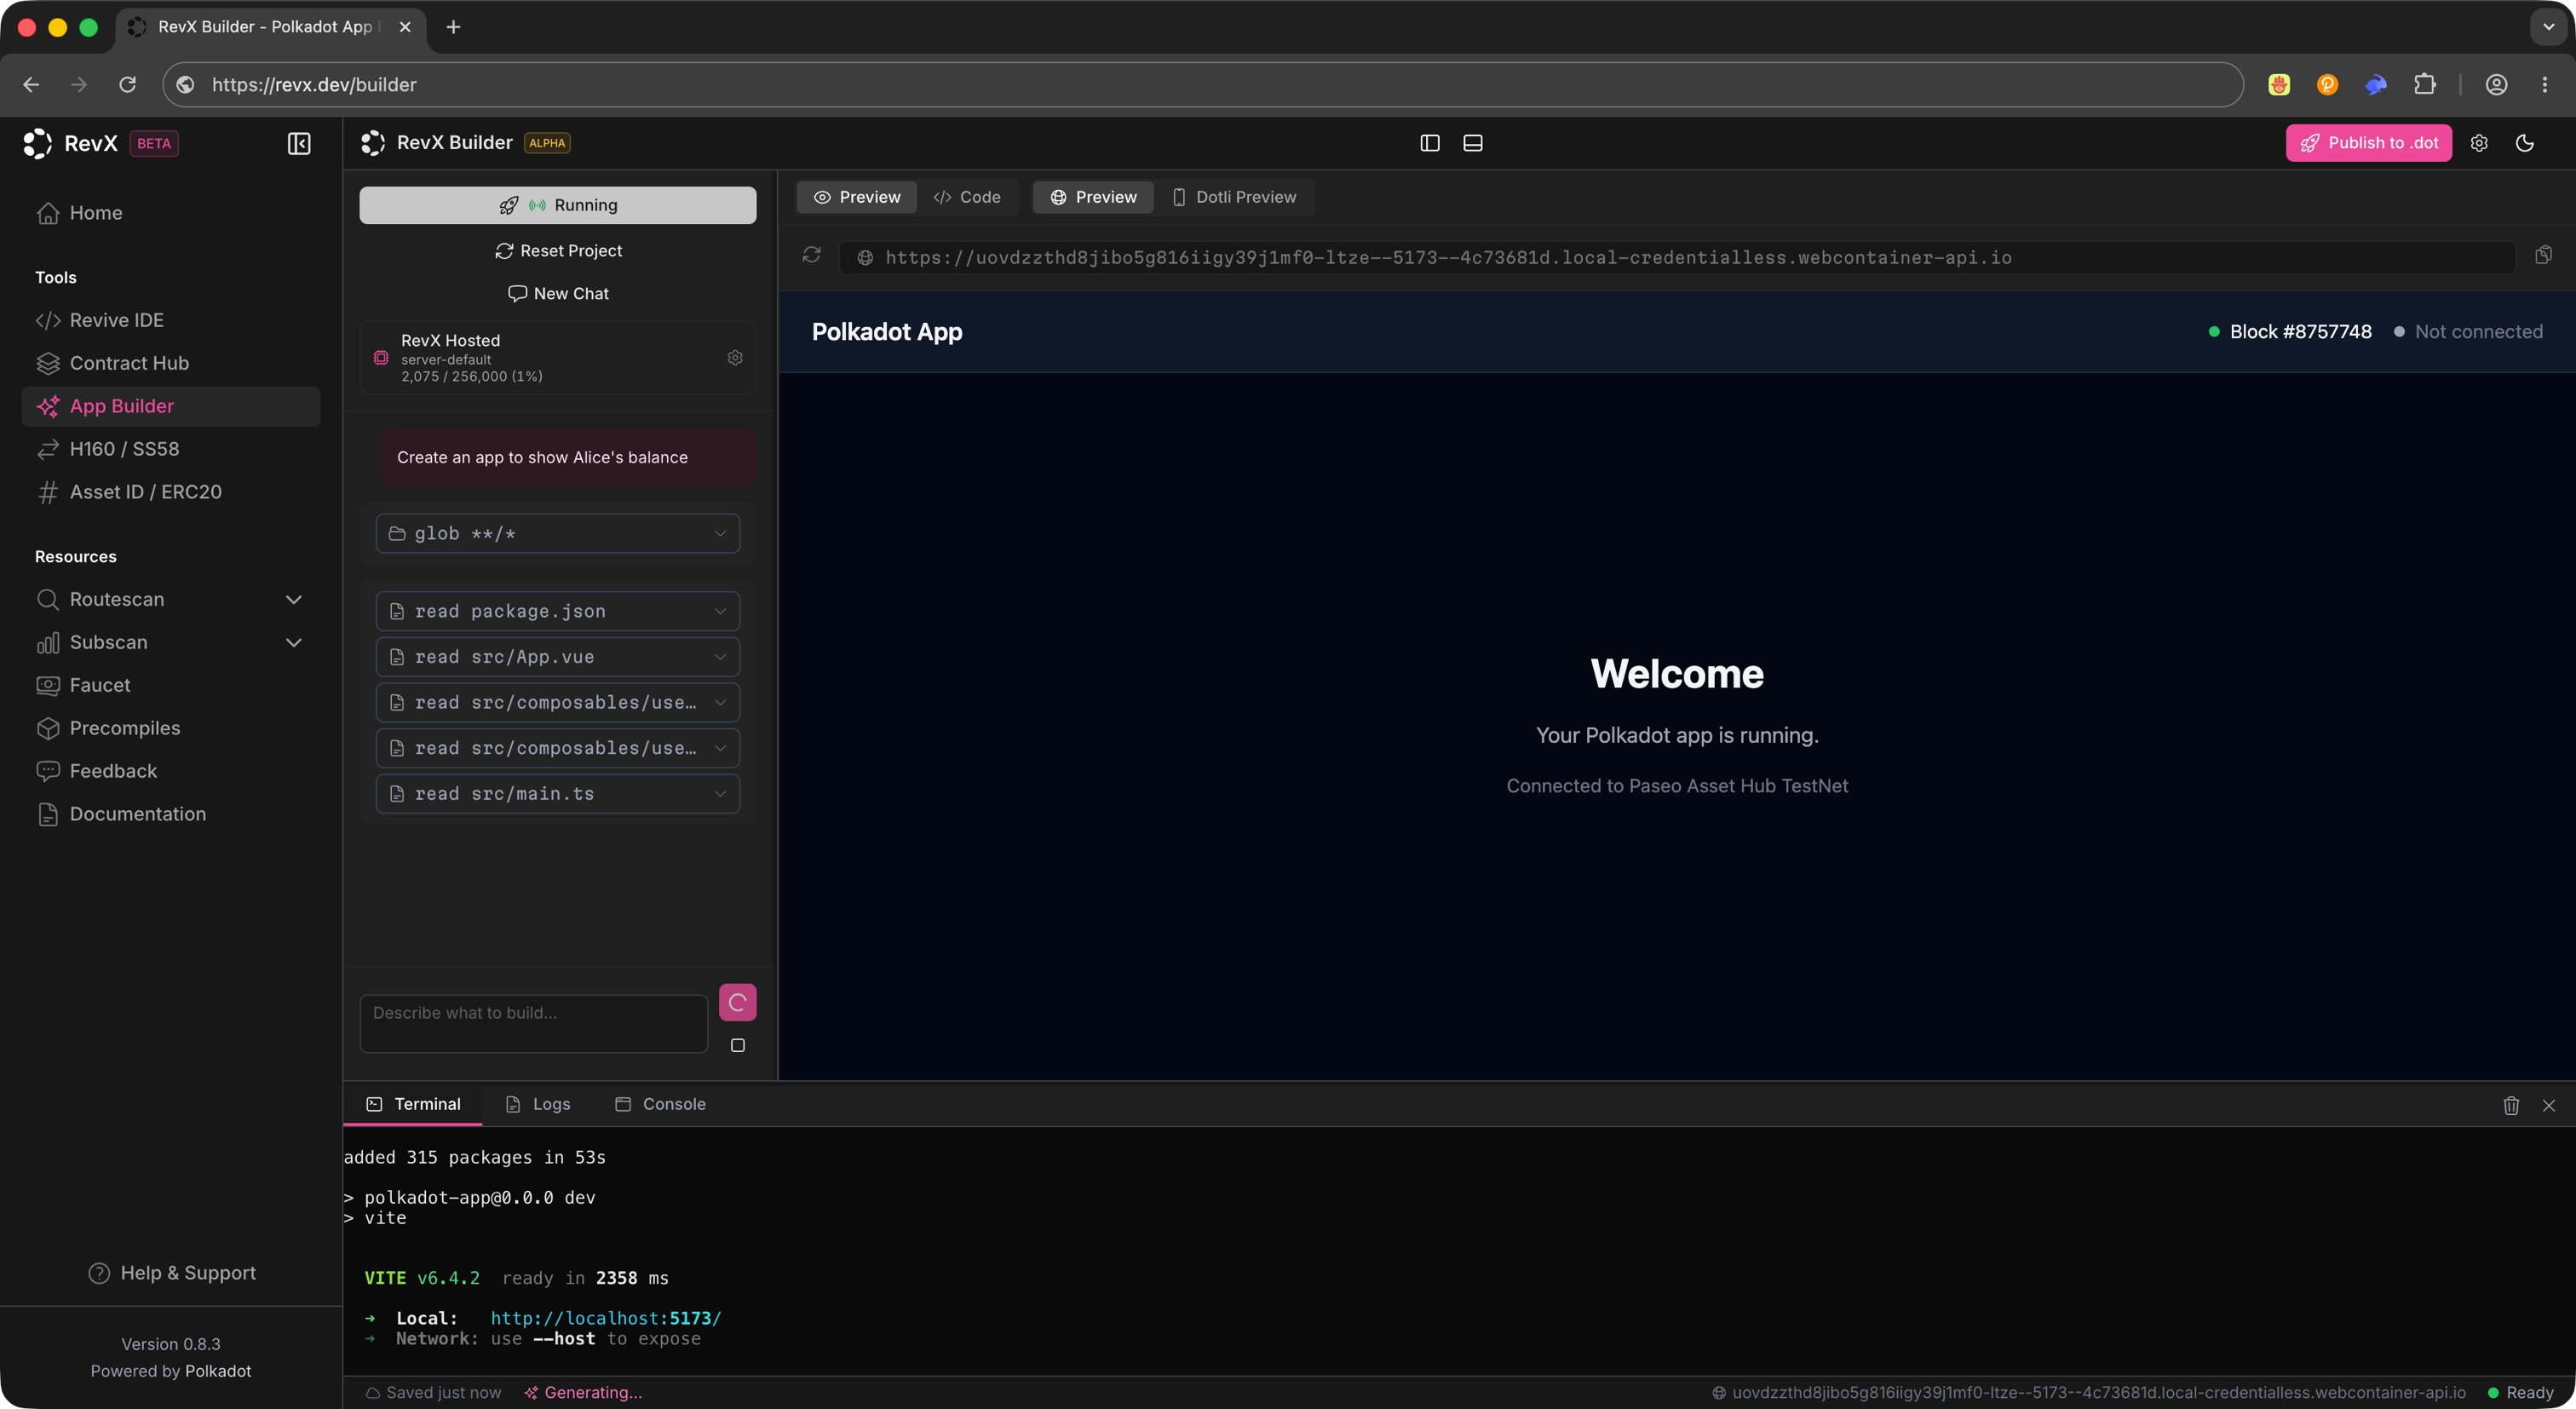
Use the chat interface to describe the app you want to build. RevX generates the application structure and code automatically based on your prompt.
!!! example "Example prompt"
Build a Product that shows the balance of Alice (a standard Substrate dev account)
After you submit the prompt, the IDE produces the project files and scaffolds the app for you to review.
!!! tip
Keep prompts concrete and scoped. Short, specific prompts tend to produce app structures that are easier to review and iterate on.
## Inspect the Generated Code
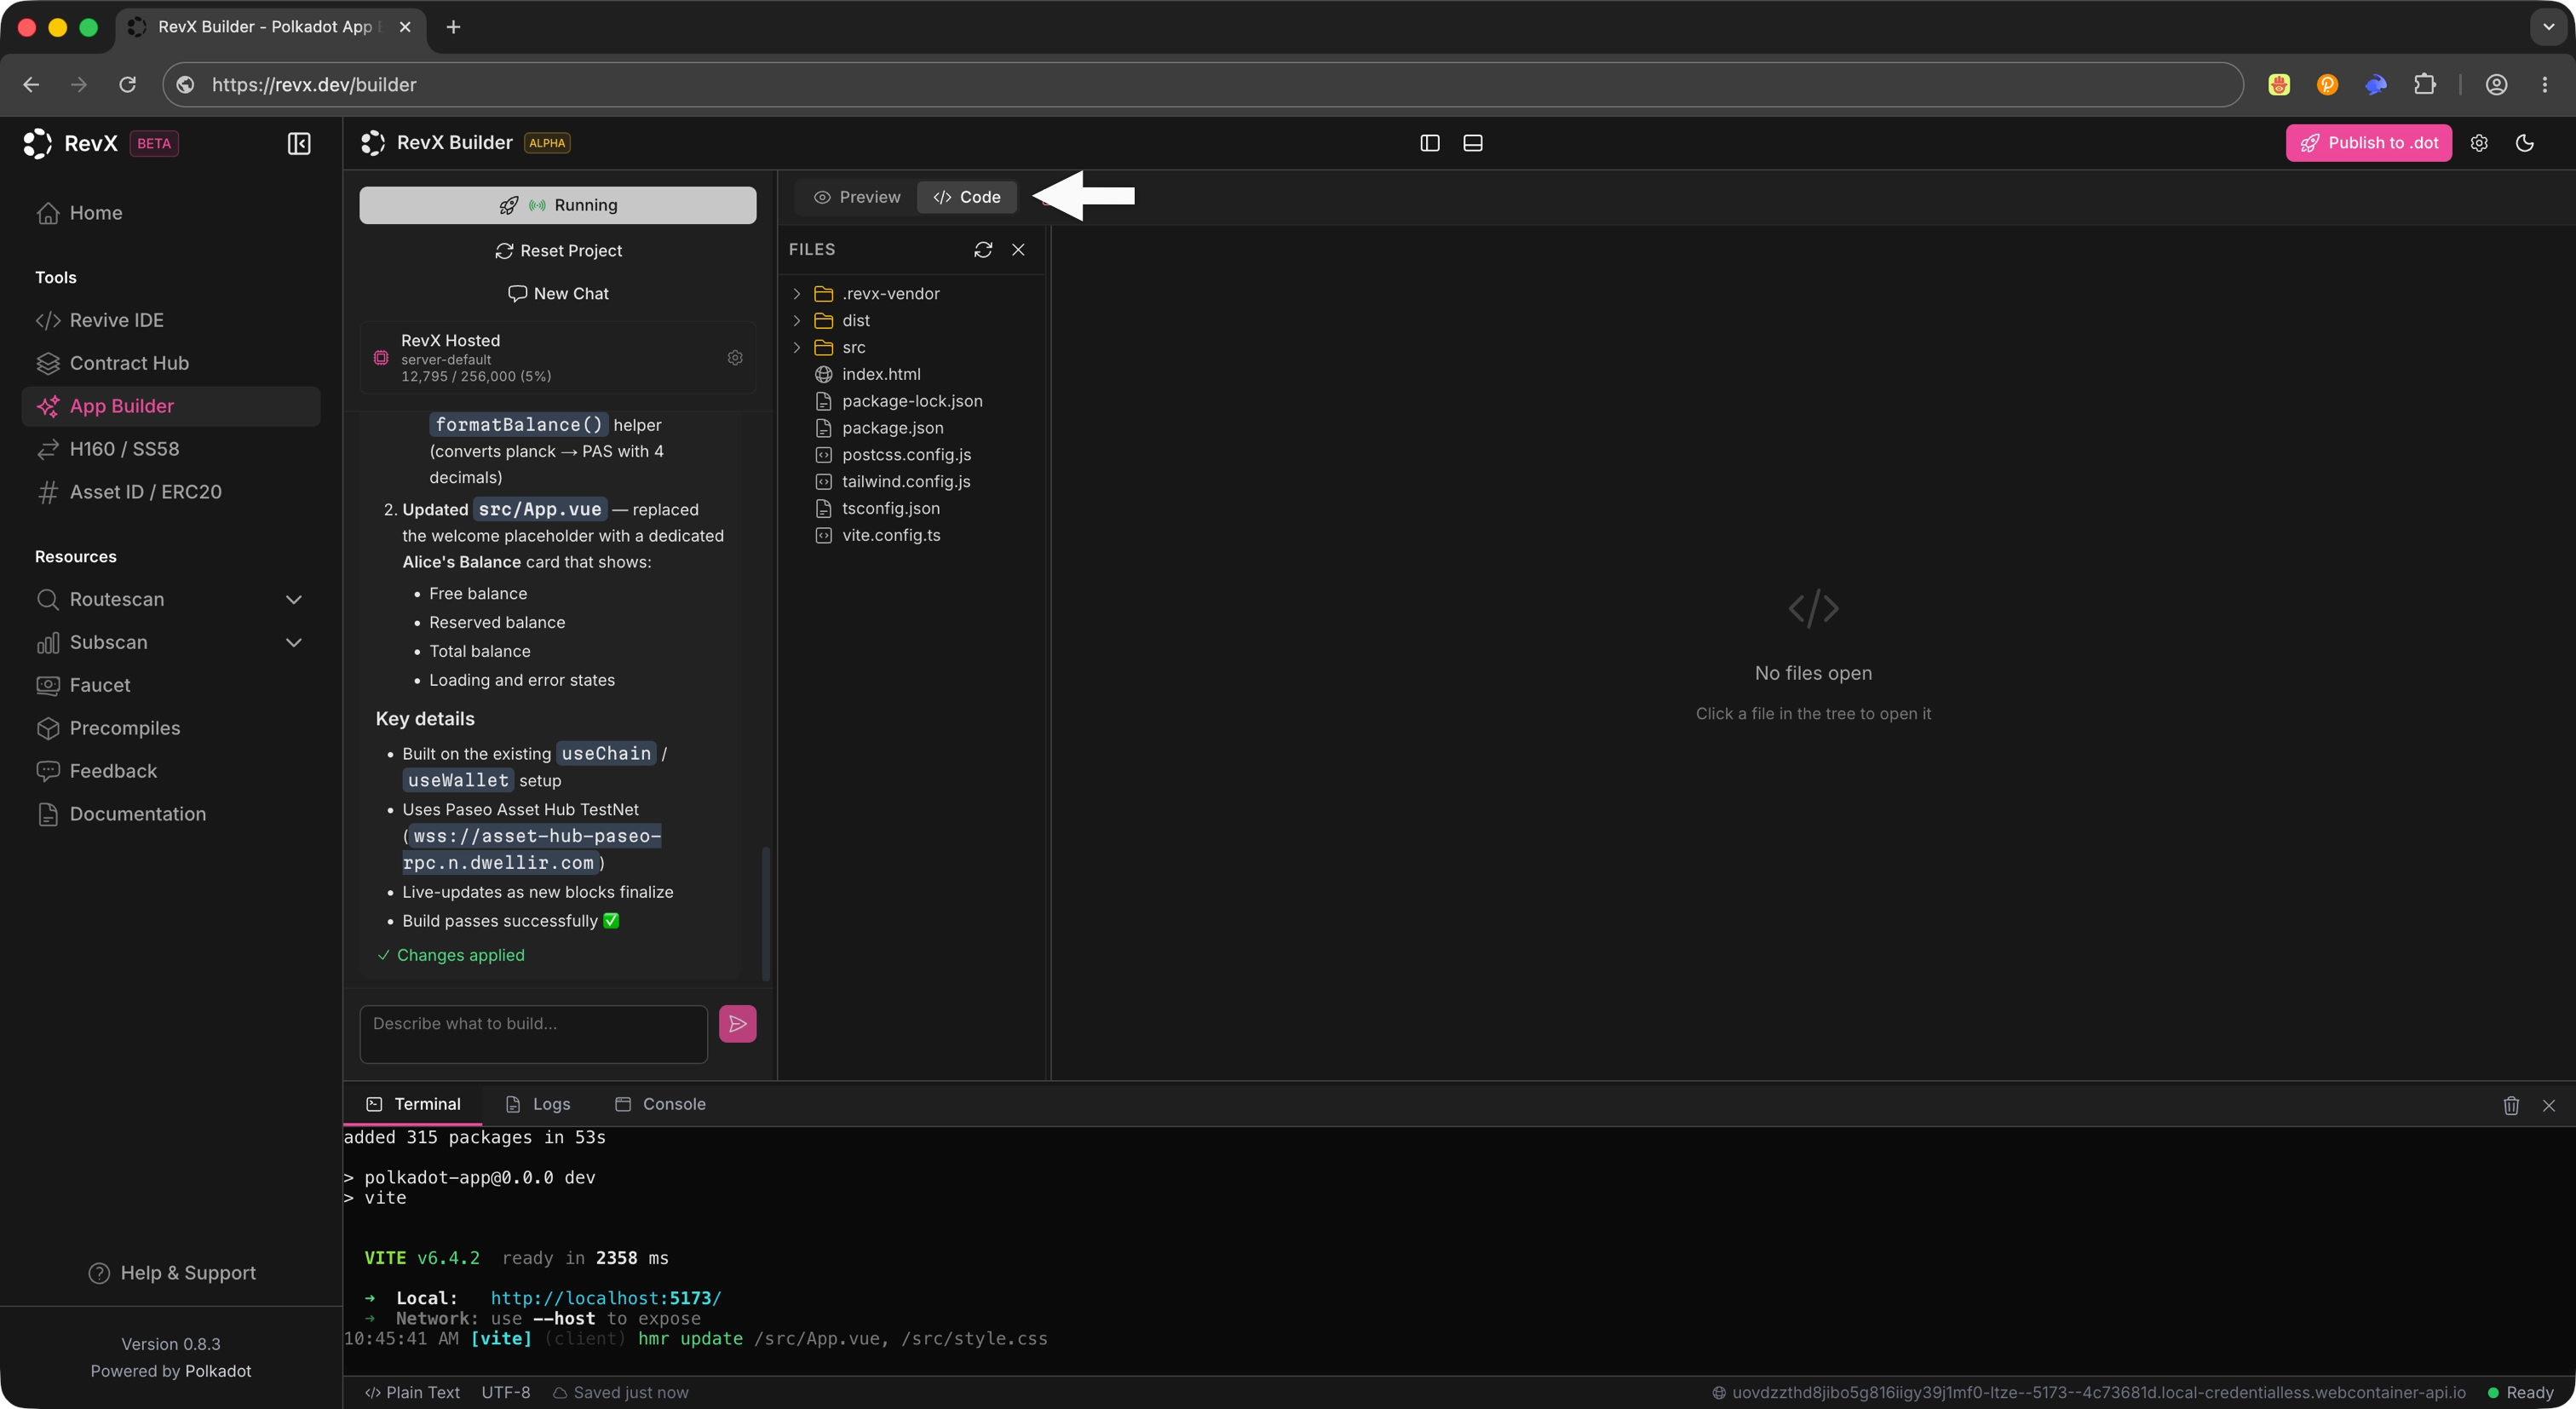
Once generation completes, open the generated files in the editor to review what was produced. You can continue iterating on the application from within RevX: refine the prompt, edit code directly, or layer additional changes through the chat interface.
## Publish to `.dot`
When your app is ready, click **Publish to .dot** to deploy the application to the Polkadot ecosystem. The publish action takes the app you generated in RevX and makes it available under a `.dot` name.
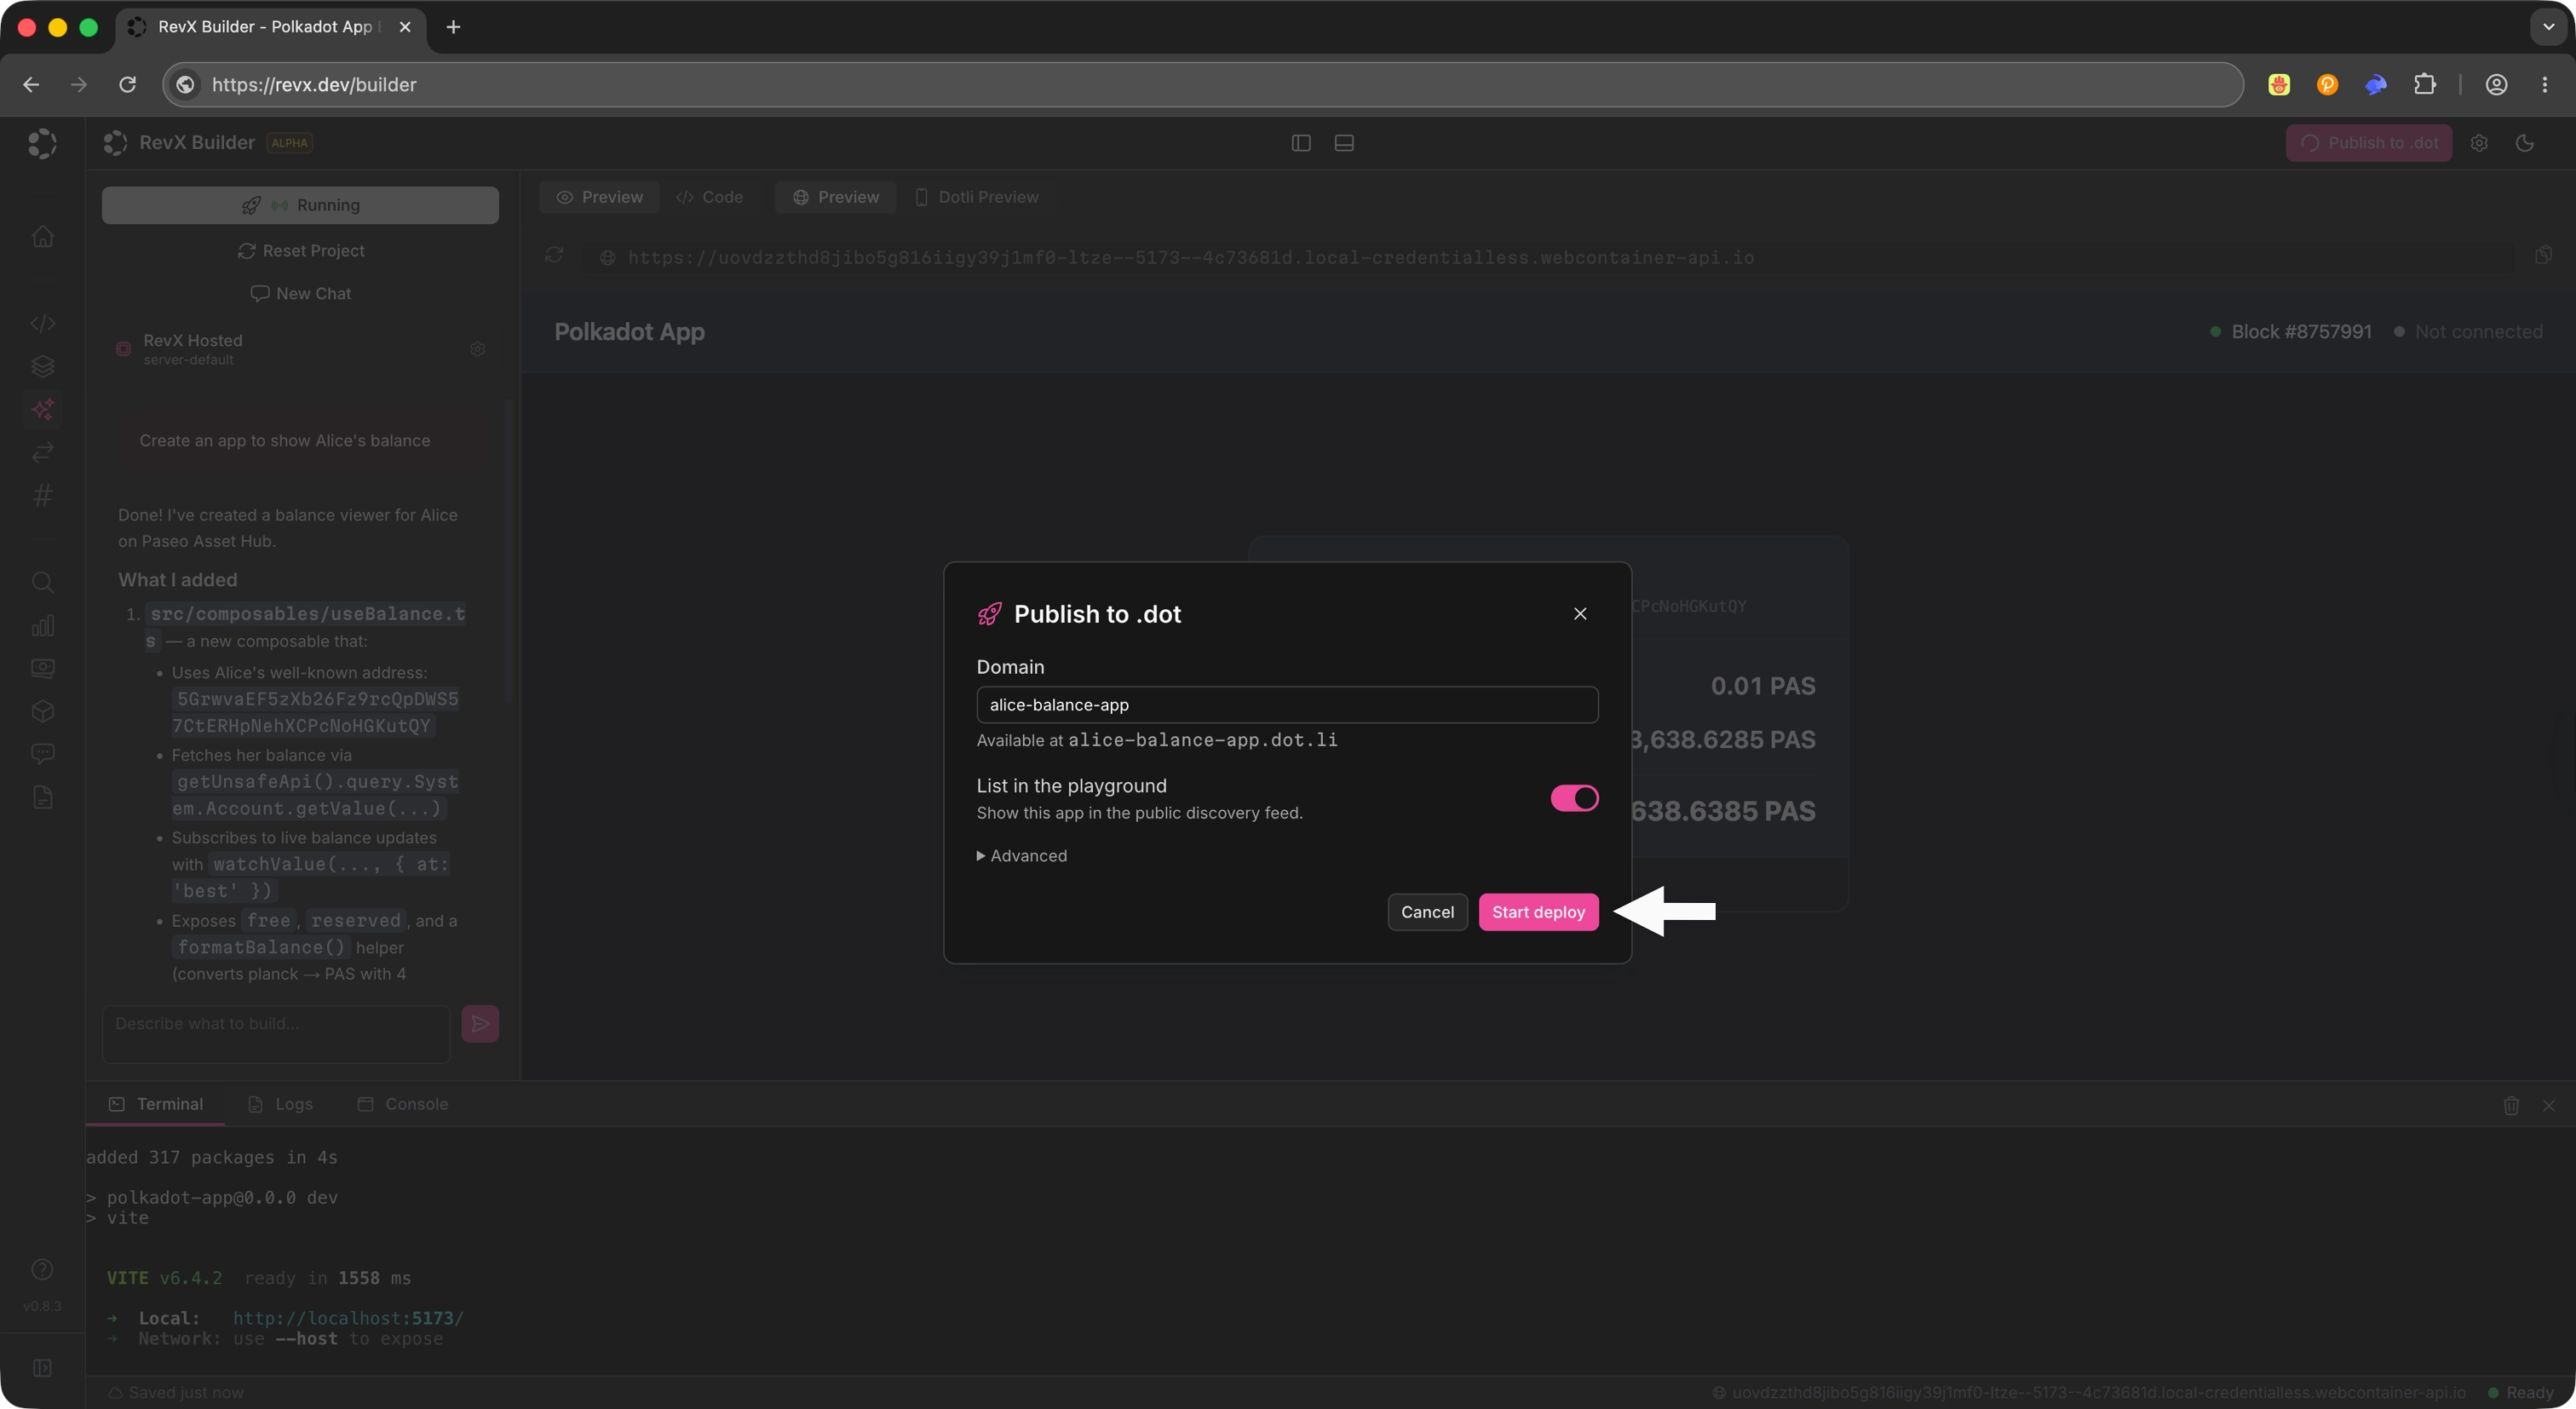
After clicking **Start Deploy**, you will be asked to sign the transaction with your Polkadot App.
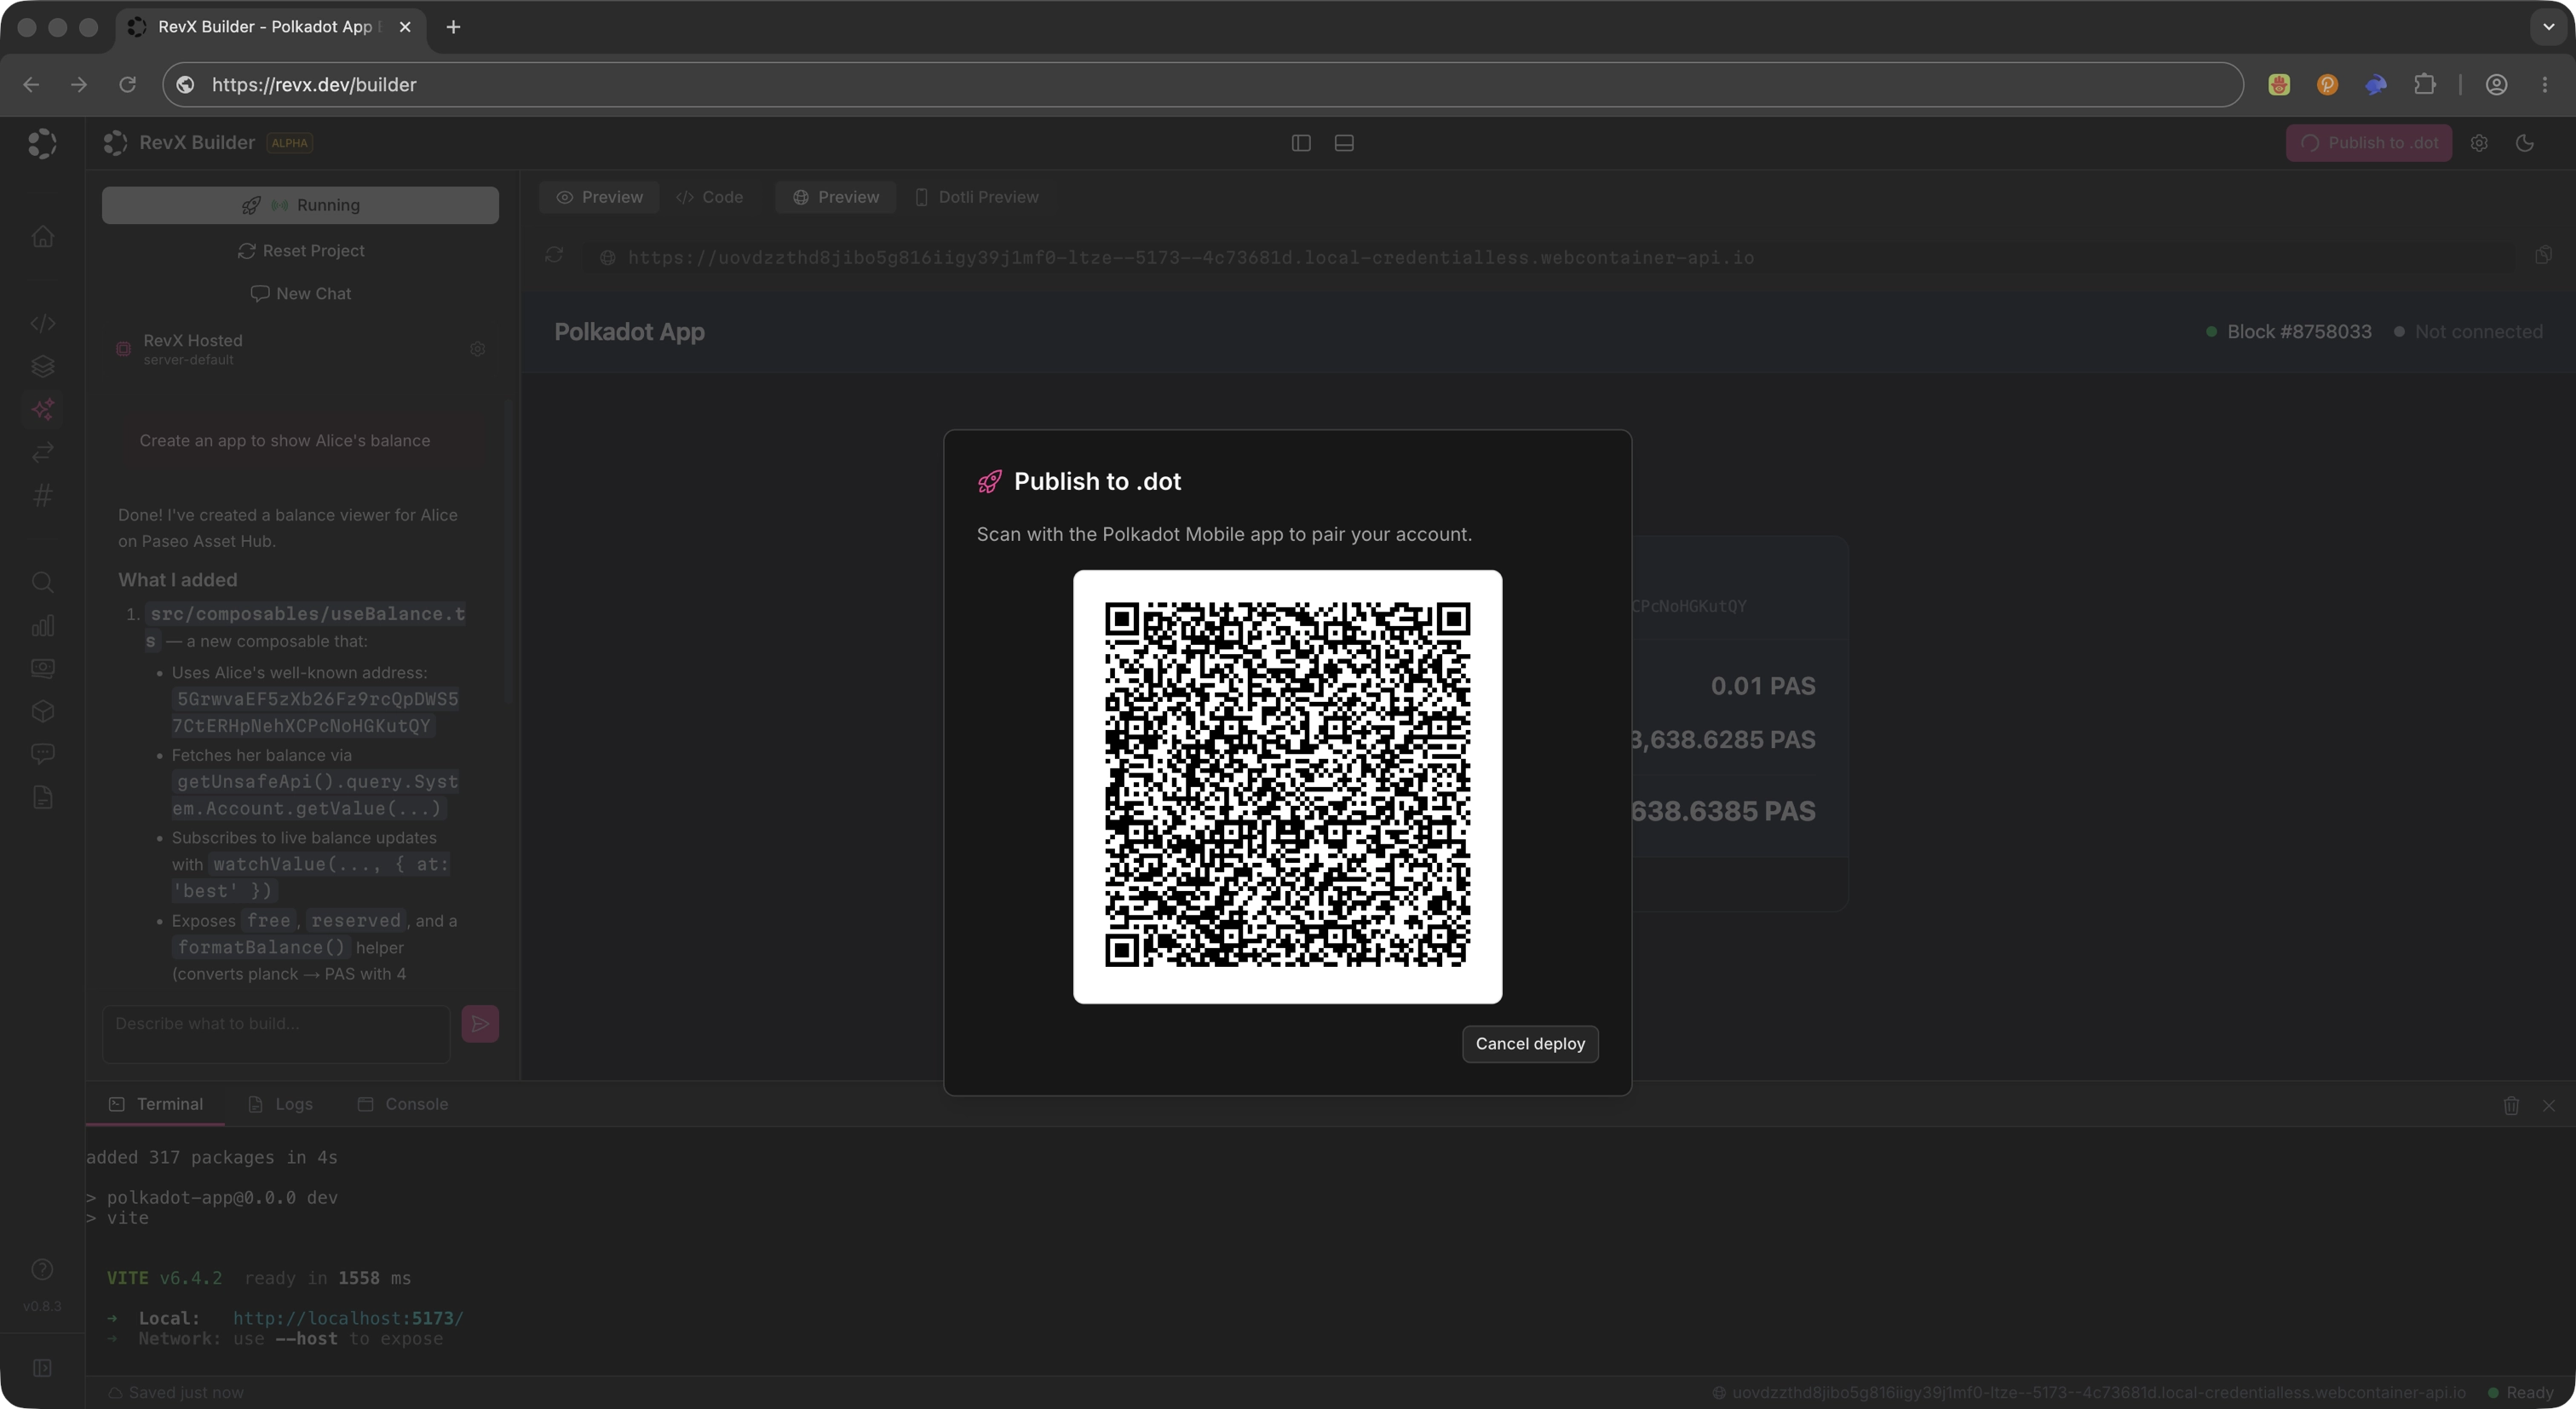
After signing the transaction, you will see the deployment progress in the terminal. The action is labeled **Publish to .dot**, but the name you receive carries the network's TLD, so on Paseo Next v2 your Product is live under its `.paseo` name. Open it in Polkadot Desktop, or on Polkadot Web at `https://.paseo.li` in any browser.
## Where to Go Next
- Guide **Build Guides**
---
Set up the local dev loop, then add capabilities to your Product: signing, on-chain reads, decentralized storage, off-chain pub/sub, and local persistence.
[:octicons-arrow-right-24: Open Build Guides](/apps/build/)